The content of the article
The nail industry does not stand still, and this is not surprising. With the onset of the season, professional craftsmen come up with new designs. Decoration with rhinestones, stickers and ribbons - all this can be used at home. Elements will give your pens grace, grooming and luxury. It is enough to choose the material, study the step-by-step instructions, and then proceed with the implementation of ideas.
Choosing a Nail Tape
- The tape is a thin strip with a glossy outer surface. The inner part is treated with glue, which ensures proper adhesion of the material to the nail plate.
- Manicure tapes for nails are sold in the cosmetics store and boutiques for nail masters. Pricing varies greatly depending on the width and length. As a rule, 1 roll costs about 60 rubles.
- There is a so-called adhesive tape that sticks to the nail like scotch tape. This type of decor is the most popular, but do not buy a tape more than 1 mm wide. On sale you will find any colors and degree of coverage (matte, glossy).
- Many girls prefer to combine thin golden or silver ribbons with rhinestones. In this case, choose small "pebbles" so that they do not look elaborate.
- When choosing a decorating ribbon, choose a material taking into account the length and shape of the nails. If your plate is sawn with almonds, use a tape of medium and minimum thickness. Semicircular and square nails fit a very thin shiny tape.
- Do not confuse metal ribbons for decorating a whole nail with thin stripes. The first option helps to create large patterns, the second serves as an addition or tool.
Technology for using nail tapes
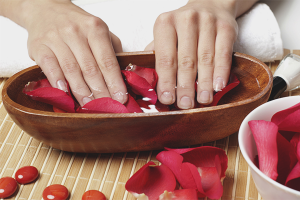
- Before using the tape, perform a manicure procedure. To do this, prepare a bath with sea salt, medicinal chamomile or shower gel. Steam the fingers for a quarter of an hour, then dry them with a towel.
- Use a pusher or an orange stylus to move the cuticle. Take a trimmer or forceps, cut the skin along the periungual roller. Cut the cuticle carefully so as not to damage the capillaries.
- Now give the nails the same length and shape. It is advisable to use a glass nail file, it prevents delamination. Take a buff for polishing, work through the surface of the nail plate to make it matte.
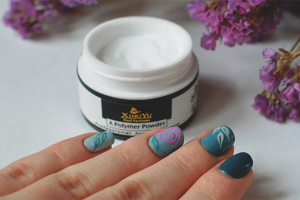
- Wait for the nails to dry. It is important that the moisture evaporates completely. Otherwise, the gel polish will not hold well and will soon peel off. Apply a primer to the plate, it will improve grip. Line the gel polish in two layers, drying each of them under the lamp.
- At this stage, the finish is not applied. The nails are covered with TOP only after gluing the tape. Wait for the gel to dry, if necessary, remove the dispersed (sticky) layer with a special liquid.
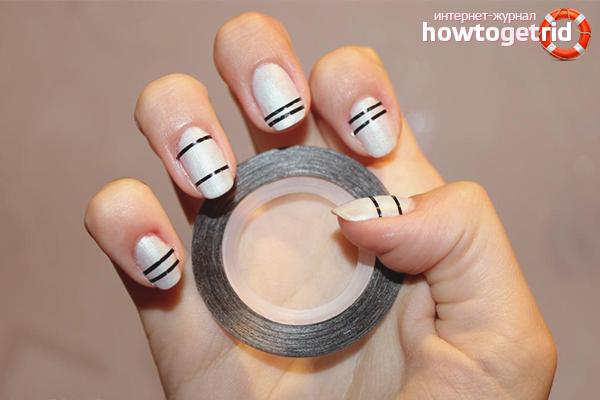
- Take the tape, cut off from the total roll so much that you have enough to complete the design. Remove the paper backing, grab the adhesive part with tweezers by the edge.
- The place of sticking depends on the design you have developed. To improve the safety of manicure, it is recommended to retreat 2-3 mm from the free edge of the plate. In this case, the tape should be attached only to the nails, without affecting the skin.
- Glue the tape very carefully, try to do everything the first time. Smooth the creases and irregularities with an orange stick, they distort the aesthetic appearance of the manicure. Apply the finish coat, dry it under a UV lamp, remove the sticky layer (if any).
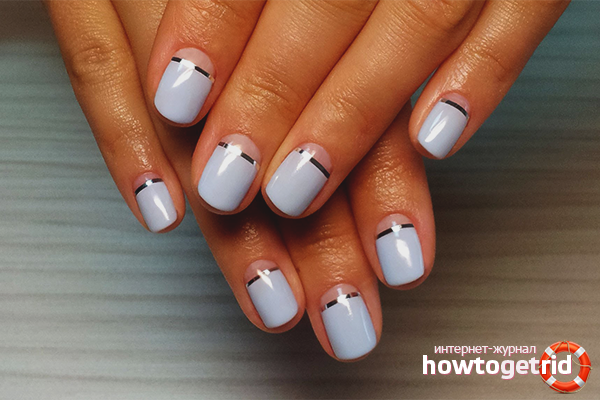
Manicure design "Lunar French"
Gluing tapes on gel polish is quite simple. One of the most common options is the "Lunar French".
- Spread your fingers, remove the cuticle in a convenient way, cut the free edge of the plate. Give the nails a shape with a glass nail file, sand the surface with a buff.
- Apply a base coat - primer. It will provide good adhesion of the gel to the native nail. Dry the base in an ultraviolet lamp for 60-75 seconds.
- Cut the ribbons, which when joined at one point form an acute angle. The length should be the same, you need 2 strips. Detach the tape from the substrate, place it at the base of the nail so that the stripes form a triangle on the hole.
- Align the tape with a stylus, positioning it flat on the surface. It is important to immediately rule out irregularities, otherwise they will make the manicure careless.
- Varnish the nail without going behind the tape. Make 2 layers of gel, drying each of them. Remove the tape with tweezers, apply the finish and dry it.
Practical recommendations
- If, according to the idea, the material should be attached to gel nails or acrylic nails, first dry the coating. Do not rush to apply the TOP layer, the nails are covered with it after sticking the tape.
- Many girls make a mistake - they don’t completely dry gel polish. In this case, the tape literally falls into the composition, the entire manicure is considered damaged.
- Ladies who use nail tape for the first time are encouraged to start with simple designs. No need to come up with complex geometric shapes or an overly colorful palette. Start work with one strip, learn to glue and align it along the length / width of the nail plate.
- Often the quality of work suffers due to the fact that the tape wrinkles. To smooth it, use a pusher or an orange stick. It is necessary to guide the tool along the tape, starting from the middle and moving to the edges of the plate.
When performing tape manicure, it is very important to know the measure. If you use rhinestones as a supplement, you do not need to attach them to each finger. It is enough to decorate two nails on each hand. Otherwise, the manicure will look elaborate, sloppy.
Video: manicure with ribbon for nails
Submit