The content of the article
How to restore bath enamel at home? If you follow the instructions, it is very simple. It is important to carefully read the manufacturer's recommendations and follow them exactly.
You can not bother, buy a new bath. Only now you will have to take into account the costs of replacing pipes, tiles, delivery services, the work of loaders ... the list is long. Restoring enamel yourself is much cheaper. The task is time consuming, but quite feasible at home. But the resulting coating is enough for 5-10 years, with careful handling naturally.
Necessary materials
First you need to decide which method will restore the bath enamel. To choose the right one, you need to carefully inspect the surface.
Deep chips, severe cracks, nostrilism - here you will need liquid acrylic, an acrylic liner or epoxy. With minor scratches, small roughness, a slight color change, cosmetic enamel restoration will suffice.
From here it is necessary to prepare the necessary:
- Respirator. It will be required at all stages of work. There will be a lot of dust, unpleasant odors.
- Cleaning powder with abrasive particles. Strictly without chlorine!
- Several types of grit sandpaper or grinder.
- Gloves. A few pairs.
- Remedy for rust. With strong deposits - oxalic acid.
- Napkins, old rags, rags, brushes. What is at hand is useful.
- Degreaser. Regular acetone is fine.
- Paint roller, brush or spray.
- Two-component enamel, liquid acrylic, epoxy resin, liner in the bath.
- Special adhesive foam if liner is selected.
- The desire to save money and do something yourself.
Preparatory stage
For any kind of work, preliminary preparation is very important. Of course, this stage can be neglected, but then you should not curse everyone and everything, when in a month the new coating will peel off safely.
Therefore, first of all, the surface of the bath is sprinkled with a cleaning powder, then carefully sanded. The better the upper layer of old enamel is removed, the smoother the new coating will lie. Sandpaper should be taken with different grit. First large, then small. The result should be a smooth matte surface.
Tip. If at this stage you use a grinder, then things will go much faster. Only without fanaticism! There were times when craftsmen cleaned the walls of the bath through. Then only a replacement, restoration will not help.
After dust is removed from grinding - with napkins, rags, rags - you need to check if there are any rust spots left. By the way, the good old vacuum cleaner also removes dust remarkably. Familiar chemicals can be used to remove rust. If they do not help, then a solution of oxalic acid does an excellent job. It is important to carefully follow the instructions on the packaging so as not to damage the enamel even more.
After all, you need to fill the bath with the hottest water, let it stand for 25-30 minutes, drain the water and dry the bath.
The next point is degreasing. With a napkin dipped in acetone, thoroughly wipe the entire surface, not forgetting the sides and plums. After drying, you can begin to apply the restoration layer.
Application of enamel to the bath
The most important thing is to carefully read the recommendations for applying enamel. Different manufacturers may have different hardening times, full polymerizations, and application technology.
Standard use method:
- The amount of hardener and enamel itself is accurately measured.
- Gently but quickly thoroughly mixed.
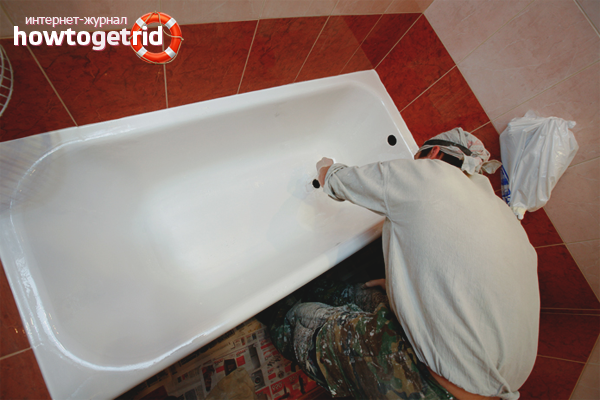
- Using a brush, roller, sprayer, apply the mixture in a thin layer.
The layer of new enamel must be thin so that drops or sagging do not form. Do not worry that the old coating shines through. After a while, apply a second coat. If the old enamel is still visible, then you can cover it with a third layer, but no more. Otherwise, such a bath will dry out instead of three days for two weeks. And dabbling in a basin for so long does not smile at anyone.
Step-by-step acrylic bath application
The technology for using liquid acrylic is slightly different from enamel:
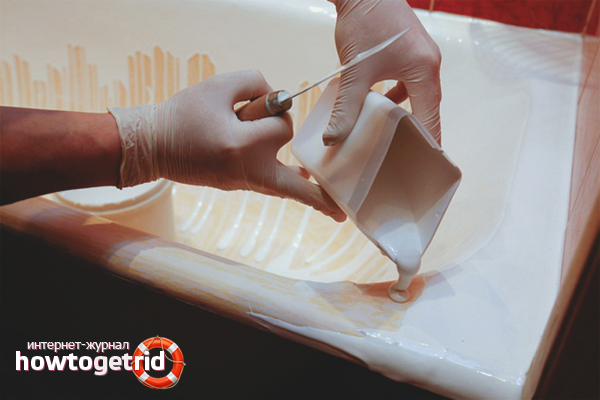
- Liquid acrylic is gently mixed with the recommended dose of hardener.
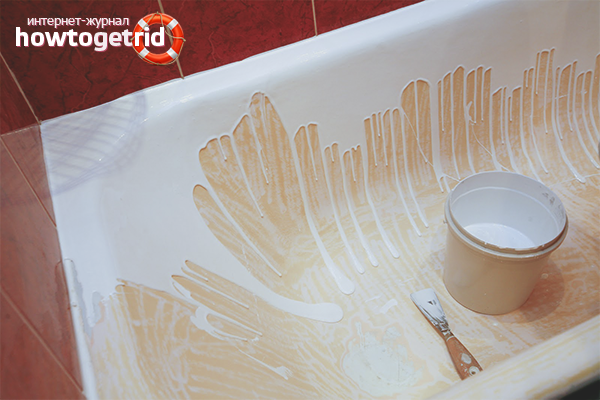
- With a thin stream, the finished mixture slowly pours onto the edge of the bath.
- Moving in a circle, you need to smoothly pour acrylic until the entire surface is closed.
Depending on the manufacturer, acrylic enamel is polymerized from one day to five days. All this time you can’t pour water into the bath. It is advisable not to go into the room at all, so that specks or dust will not get on the coating.
It is better to take a container for mixing the components more immediately. It is better to drain excess fluid through the drain hole than 50 grams of the mixture is not enough.
Tip. The longer acrylic cures, the longer the new enamel will last. So, one-day drying will please with a smooth coating all year. A five-day will allow you to enjoy a beautiful bathroom for at least 10 years.
Liner application technology
An acrylic bath liner is a good alternative to restoration. Less work, better results. True, this method is suitable only for those who have a bathtub in a standard form. Of course, modern technologies offer custom-made acrylic liners - of any shape, size, color. But then the cost soars high, it’s cheaper to buy a new one.
But for owners of a bathtub of a classical configuration, the game is worth the candle. The technology itself is quite simple to execute. The preparatory phase is exactly the same as when applying enamel. And hereafter:
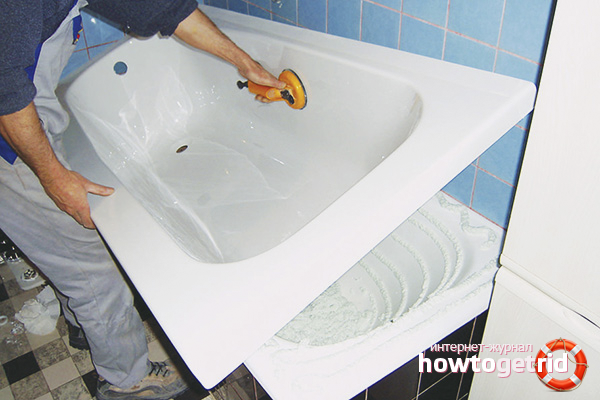
- The insert is inserted into the old bath.
- Extra sides are cut and drain holes are cut.
- Special adhesive foam is applied to the old coating and the outside of the acrylic liner.
- Pressed with effort. For better grip, you can pour cold water into the bathtub to the top and leave for 24 hours.
- After a day, the joints are additionally fastened with sealant or liquid silicone.
- After drying completely, splashing happily in a new bath.
Tip. To evenly apply the adhesive layer, you need to choose the one in the cans. It will turn out faster, and it’s more convenient to use. By the way, so that the excess glue does not come out, it is applied in stripes, and not in a continuous layer.
Enamel repair with epoxy
The restored area is prepared as described above. Then you need to take dry titanium white or porcelain fragments, powdered. Mixed with epoxy prepared on the recommendation on the packaging. A thin layer should be applied to the resulting mixture on the damaged area of enamel.
Such a patch dies about 5-7 days, but it lasts more than three years.
Tip. Putting an epoxy with a spatula is easy. But what to level out? A simple razor blade does an excellent job. Just be careful not to cut your fingers.
Tricks, subtleties, nuances
To get the best quality result, there are some recommendations.
- A vacuum cleaner will save you from the tedious collection of garbage, small crumbs, dust.
- To quickly dry the bath at the preparatory stage, you can use a hairdryer, a fan or simply arrange a draft. Only a hairdryer is needed for household, not construction, so as not to overheat the old enamel.
- For better adhesion of acrylic to the surface, you can pre-ground the surface. True, the primer for acrylic smells very sharply, so a respirator and good ventilation should be required!
- When applying a new enamel with a brush, streaks very often remain. Spraying partially solves this problem, but it’s important not to overdo it. The soft roller is most convenient for covering. It is important to take a short hair so that there are no bubbles left.
In order for the new coating to last as long as possible, you need to use it carefully:
- do not wash in a bath with bleach or aggressive bleach;
- clean only with mild detergents without abrasive or acid;
- try not to drop heavy objects inside;
- do not jump in the bath with shouts: “My new, beautiful, brilliant!”
Subject to these simple recommendations, the new enamel will serve faithfully for several years, as well as save a good part of the family budget.
Video: liquid acrylic bath restoration

Submit