The content of the article
The increased humidity and water splashes that occur while bathing in the bathroom are the main cause of mold, mildew and unpleasant odors in the bathroom. To prevent moisture from soaking in the walls and floor, you need to not only install the floor and wall tiles correctly, but also pay special attention to sealing joints. High-quality sealant for the bathroom will not only help prevent mold in the room, but also reduce the risk of flooding the neighbors from below. But so that no problems arise during the installation process and during its further operation, you should carefully study the technology of its installation and choose the right material that will be used to seal the joints.
Sealing methods
To seal the seam between the wall and the bathroom, you can use the following materials:
- Polyurethane foam. The fastest and most economical way to close the joint between the bathtub and the wall is to use foam. But such a technology in many cases is inappropriate, because the slots treated with this material look extremely unaesthetic and spoil the interior of the room.
- Sealant. If the seam between the wall and the bathroom has a small width (no more than 1.5-2 cm), it can be sealed with a special sealant. These materials come in three types - acrylic, silicone and combined. Sealing a bath with such compositions will be more costly and require more time than in the case of polyurethane foam. But the joint, sealed with synthetic sealant, will be 100 percent protected from moisture.
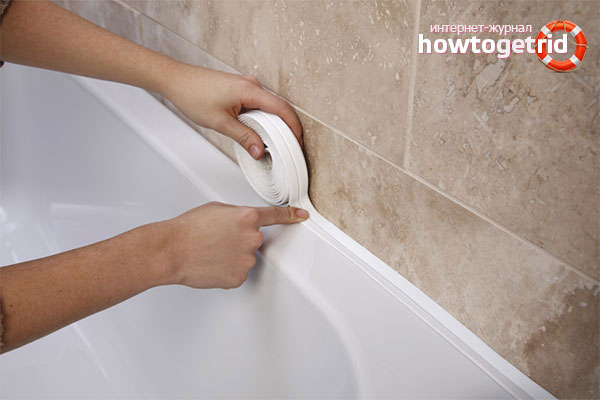
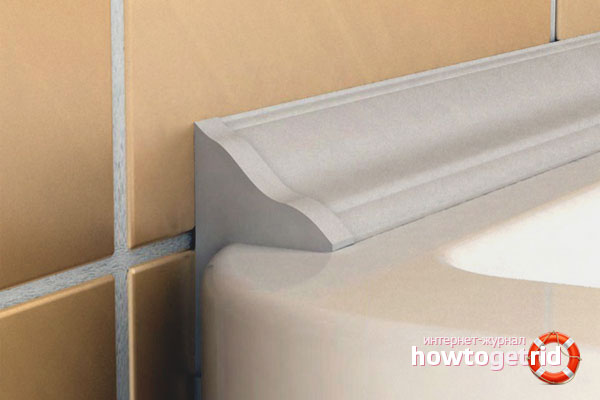
- Skirting boards. PVC profiles, in which there is a self-adhesive tape, look more aesthetically pleasing and attractive. Thanks to them, the seam will be almost invisible, and moisture through it will not penetrate the walls and floor.
How to choose a silicone sealant
If you are going to seal the joint between the bathroom and the wall with silicone sealant, you should not buy the first compound that comes to hand. Examine the labels on several cans and pay attention to such characteristics:
- The concentration of rubber. It is desirable that the sealant contains at least 40-50% rubber impurities. The higher this indicator, the more effective the material will be.
- Pigment concentration. The pigment (hydrophobic filler) should be present in the sealant at about the same concentration as rubber. If it turns out to be too small, the joint between the wall and the bathroom is quickly depressurized due to the constant exposure to moisture, and it will have to be repaired.
- Weight. For work, one can weighing 0.5 kg is enough for you. But you should not buy material in too small a quantity. After all, products from different batches can significantly differ in properties, and because of this, one fragment of the seam can be depressurized faster than another.
Please note: there are two types of silicone sealant - acidic and neutral. It is the second one that is the only material in which special additives against the appearance of the fungus are present. In other formulations there are no such impurities.
Features of acrylic sealants
Acrylic sealant for the bathroom is of two types - moisture resistant and unstable. Of course, to work in conditions of high humidity, you must choose the first one. The main difference between acrylic and silicone compounds is that they are less flexible. Therefore, if the bath is not fixed firmly (there is a slight backlash), then the use of acrylic products will be inappropriate.
In addition, such compositions have a number of specific properties:
- Color stability. The colored acrylic sealant for the bathroom does not lose its original color with prolonged use.
- Practicality. The joint between the wall and the bathroom, sealed with an acrylic mixture, can be further processed with plaster and any paint.
- Security. Unlike other formulations, such products do not contain organic solvents. Therefore, they are absolutely safe and do not cause skin irritation in case of accidental contact with water during bathing.
Preparatory stage
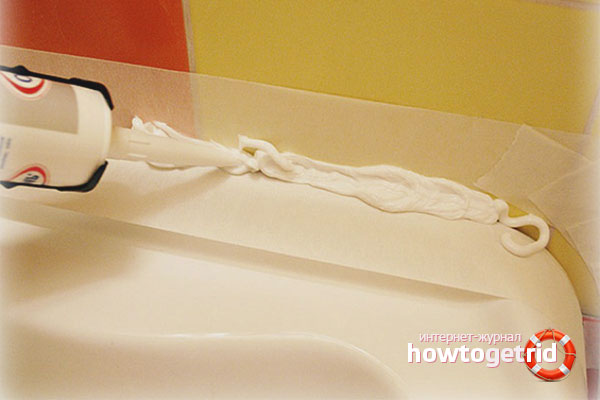
Before starting work, it is necessary to remove from the room all construction debris that remains after installing the bathroom, wipe the walls from dust and wait until the work surfaces are completely dry. After that, they must be degreased with alcohol, acetone or gasoline. To prevent the mixture from reaching visible sections of the walls, masking tape is pre-glued to the seam borders. This will avoid excessive contamination of the surfaces and make the joint perfectly smooth.
Please note: to facilitate the application of the sealant, the can should be left in a warm place for a while before it starts. If the temperature of the mixture is slightly higher than the temperature of the air in the bathroom, the seams will be much easier to apply and level.
Sealant Application Procedure
After the wall and the adjacent side of the bathroom are prepared, you can proceed directly to the procedure. Sealing the joints in the bathroom is carried out according to the same technology, regardless of the type of sealant used (whether it is acrylic, silicone or combined):
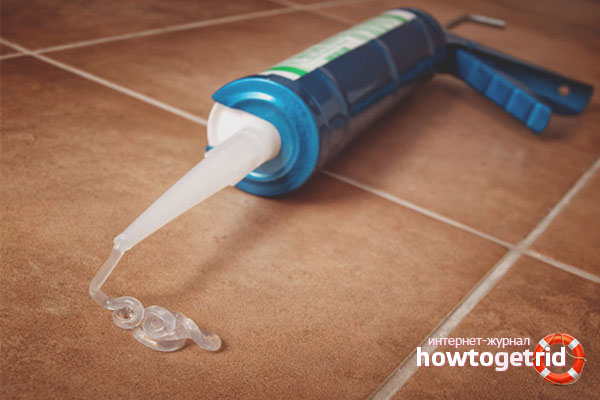
- A plastic nose on a can of sealant is cut with scissors. If the joint is narrow enough, it should be cut closer to the edge (so that the seam does not work out too wide).
- With neat and smooth movements, the sealant for the bathroom is squeezed out of the spray can onto the work surfaces. The seam should be smooth and continuous. Otherwise, the joint between the wall and the adjacent side of the bathtub will not be tight.
- As the mixture is applied, the seam should be carefully aligned with a finger dipped in soapy water. This will not cause any harm to the skin on the hands.
- After the joint is completely sealed, the seam should thoroughly dry. Do not rush and turn on the water in the bathroom on the first day after completion of work.
How to repair large gaps with the baseboard
If the gap between the wall and the bathroom is wide enough (more than 2 cm), a PVC skirting board can be used to seal it. For this, it is advisable to choose a self-adhesive profile. It contains a special adhesive tape, which greatly simplifies the installation technology and eliminates the need for additional adhesives.
Sealing the bath with such materials is as follows:
- Adjacent surfaces are thoroughly cleaned and degreased. If dust or debris remains on them, self-adhesive tape will not be able to provide tight contact between the bathroom and the wall.
- Next, you need to cut a piece of the plinth of the desired width. For this, you can use an ordinary hacksaw.
- In places where adhesive tape will be applied, masking tape should be glued.
- If necessary, you can pre-blow the gap with foam (but this step is optional).
- With the help of a building hair dryer, the baseboard is heated to the temperature at which the adhesive tape is activated (about 60-70 degrees).
- Next, the baseboard adheres tightly to the surface. In order for the tape to provide a tight fit, the profile should be pressed tightly to the joint for a few seconds.
- After installing the baseboard, small gaps may remain. They can be sealed with a silicone sealant can.
- Upon completion of work, it is necessary to leave the bathroom for about 12-24 hours, until the walls and seams are completely dry.
If there is no adhesive tape in the baseboards, you can use liquid nails to secure them. They are applied to both glued surfaces, after which the profile is laid. In this case, do not immediately press it with great effort. You need to wait 2-3 minutes, and only then it can be gently pressed into the joint. At the final stage, excess hardened glue should be cut off and the work surfaces should be completely dry.
Video: how to close the seam between the bathroom and the wall


Submit