The content of the article
All girls want to look beautiful, going to work or a special occasion. In this case, much attention is paid not only to makeup, along with manicure, but also to hair. Beautiful styling completes the look, especially if the curls fall on the shoulders with light waves. Not everyone is ready to visit beauty salons in order to do perm. Beautiful ladies are sophisticated in every possible way, using an iron to create curls, curlers, hair dryers and even napkin rags.
The choice of stylers for creating wavy hair
- Foam. The composition is designed to fix the wound curls, the foam also raises the hair in the root zone. Products should be chosen for girls with thin and naughty hair. To use the product, you must first wash your hair. Then the foam is squeezed out in the palm of your hand and rubbed, after which it is distributed over wet strands. It is important not to overdo it with the amount of funds (volume the size of a ping-pong ball).
- Mousse. Like foam, the composition is distributed to the hair in the same amount. However, the product can be distributed on dry and wet strands. The styler is suitable for girls with oily and combination hair types. Ladies with dry hair should refuse to use mousse, since it causes a drying effect. The final result directly depends on the reaction of the hair to the stylers: if the curls are naughty, apply more.
- Gel aerosol. The composition does not stick together strands, convenient to use, suitable for all types of hair. To start laying, you must first wash, dry and comb the curls. After this, the product should be sprayed and leveled over the surface with a comb. Styling is more convenient with curlers, irons or hair dryers.
- Fixing varnish. The styler is designed to fix the final hairstyle. With the help of varnish, curls retain their shape for a long time. The laying condition directly depends on the degree of fixation, it can be light, medium, strong and super strong. If you will use varnish to create volume, spray the composition onto the root area. Do not forget that the varnish is applied from a distance of 20-25 cm, otherwise it will stick together the hairs.
Making wavy hair a hairdryer
- Wash your hair, partially dry with a towel. Spread the foam or styling mousse along the entire length of the hair, pay attention to the roots. It is advisable to use a styler with thermal protection.
- To create waves, medium or small diameter brushing is required. Take a thin comb, divide the entire pile into curls, stick to different sizes. Thus you will create a romantic image.
- Now lock each strand with a hairpin so that excess hair does not interfere with the creation of a hairstyle. Wrap a free curl on a comb, putting brashing at the root zone.
- Winding is carried out clockwise. Now blow dry the resulting spiral until the moisture evaporates. Otherwise, the waves will decay after 20 minutes.
- Repeat manipulations with each curl, twisting it on brashing and drying. If desired, you can wind the strands clockwise or counterclockwise.
- When you make all the hair wavy, start lifting the curls at the roots. Spray the strands with varnish for extra volume.
- You can use several brushings to create a romantic look. In addition, each round comb should have its own diameter.In combination with winding strands in different directions, you will make the image individual.
Light waves on the hair
You can make your hair wavy with an iron in several ways. Check out each option, choose the appropriate one. Before the procedure, you need to wash your hair, dry well and comb.
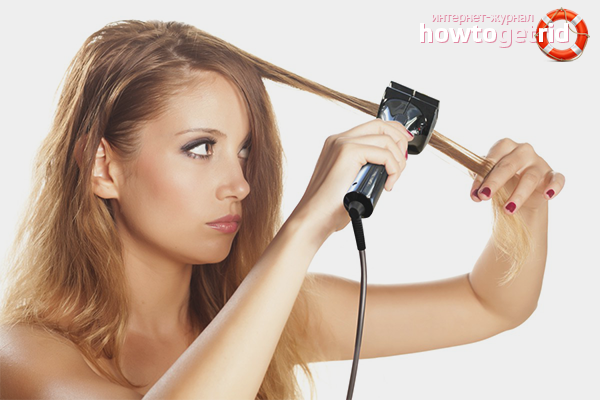
Option number 1. Waves of the same form on the hair
- Distribute the product with thermal protection over dry hair, warm the iron to a mark between the average maximum. Using a comb with a separator, make one parting from the forehead to the back of the head, and the second - from ear to ear.
- You got 4 sections with parting in the shape of a cross. Fix three parts with hairpins, leave one loose. Divide it into 3-4 curls. Lift one strand, grab it with tongs in the middle. Keep the appliance at right angles to your hair.
- Now turn the lock in one clockwise rotation. Then put the iron in an upright position (the cord is at the bottom). Gently move your hand to the tips, creating a styling. Perform manipulations with each curl.
- After twisting the first part, dissolve the second, repeat the action. You should get the same sized spirals. Comb your hair with your hands, trim curls. Sprinkle them with varnish from a distance of 20-25 cm.
Option number 2. Soft wavy hair
- Prepare by washing your hair with shampoo in advance. If you have oily strands, do not use balm. Dry your hair well, distribute the product with protection against heat. Apply a styler (gel spray is most suitable).
- Take a comb with a tip to separate the hair. Make 3 straight partings from the forehead to the back of the head and 3 partings from one side of the head to the other. Pin each section, leave one dissolved.
- Divide part of the hair into curls. Pinch one strand between the plates of the iron, begin to wind up to the roots (as when working with a curling iron). When you reach the scalp, wait half a minute. Dissolve the curl, do not comb it and do not touch.
- Twist each lock in the same way. You can adjust the volume of curls: the thicker the initial curl, the more voluminous the wave will turn out. When the hairstyle is created, sprinkle it with varnish to fix it.
Option number 3. Romantic waves on the hair
- After washing and drying the hair, divide the head into 2 equal parts. To do this, take a comb around the head, you will get the lower and upper sections.
- Divide the top of the head, the back of the head, and the hair growth zones at the top into very thin locks (about 7-10 mm in diameter). Wrap each of them around your finger to get a circle. Pin the scalp with hairpins.
- When the top is locked, do the same with the bottom. Preheat the iron to 195–205 degrees. Unclench the tongs, grab each hoe vertically (without pushing the plate into the circle). Wait a third of a minute without removing the clip from the hair.
- Now do the manipulations with each part of the hair. When all the strands are clamped with an iron, do not rush to dissolve them. Wait 10 minutes, then remove the hair clips. Use varnish to better fix the waves.
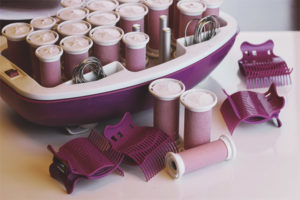
Curling hair in curlers

- Prepare large curlers, it is with their help you get beautiful waves. No need to take medium or small devices, they are designed to create curls. If desired, you can use curlers of different diameters.
- Before the procedure, you need to wash your hair. Do not use balm, do only shampoo. Dry the curls with a towel, evenly distribute the styling agent (the foam or mousse is most suitable).
- Divide the entire mop into parts with a thin comb. You should form 4-5 squares. Pin each section so that they do not get tangled. Leave one part, divide it with curls.
- Now take the curlers, you can use the hot ones.Start wrapping from the back of the head, keep in the same direction. Next, go to the crown, whiskey and hairline.
- When all the hair is wound up, blow it dry with a hairdryer. Wait 1-2 hours for the styling to set. The longer you stand the curlers, the waves will be denser. After the allotted time, dissolve the hair, separate the curls with your fingers. Sprinkle the curls with varnish.
Making waves on your hair with rags
- First you need to cook curlers. Take old nylon tights or stockings. Cut them into strips of 2-4 cm wide. Pull each segment by the edges so that the fabric curls. Now prepare the landscape sheet, cut it into rectangles. Wrap pieces around rags.
- Curlers are done, now prepare the hair. They need to be washed and dried with a towel. You should not use a hairdryer, since the strands must be wet before starting the wrapping. Divide the entire pile into curls in a chaotic manner, try to adhere to the same thickness of the strands.
- Take the curlers, place the bobbin under the curl, stick to the area above the middle. Wind the hair to the ends, tie the edges of the cloth in a tight knot. It is advisable to wind each curl counterclockwise.
- When you have processed all the hair, tie a head scarf around your head. Wait 3-5 hours, depending on the desired result. To get dense wide waves, it is necessary to wind thick strands. After the set period has passed, carefully remove the curlers. Comb your hair with your fingers, sprinkle with varnish.
To create wavy curls, consider styling options with an iron, rags from old stockings, curlers or a hairdryer. You can use the curling iron, in this case it is enough to wind the hair from yourself, starting from the tips. Do not forget to spray the hairstyle with varnish so that it retains its shape longer. As an aid, apply foam, mousse or gel spray to the strands.
Video: light waves without the help of a curling iron, ironing and curlers
Submit