The content of the article
Grout is applied to the joints of the tiles to hide small chips and nicks remaining at the edges of the facing material. Silicone and epoxy compounds protect the walls from the accumulation of moisture and fungus, cement varieties improve adhesion between individual fragments. Planning begins with the selection of high-quality material, the preparation of a plastic solution and the preparation of seams for the procedure.
Types of grout
Seams in the living room and bedroom are treated with cement mixes. They consist of an astringent derived from gypsum and clinker, colored pigments and additives, which are responsible for the quick hardening of the paste and its plasticity. Cement-based grouts are inexpensive, have a variety of colors, but are not resistant to moisture. Compounds are rarely used to process joints in the bathroom. In a solution that is to be regularly contacted with various liquids and steam, latex plasticizer is added instead of water.
Seams in rooms with high levels of humidity are wiped with epoxy. The composition of the powders includes hardeners and pigmented resins. Epoxy grouts are expensive, but they are resistant to dirt and detergents, do not absorb moisture. The solutions prepared from pigmented resins are thick and viscous, therefore only professionals who cope with the joints between the tiles repeatedly cope with them.
Corner and deformed joints are treated with silicone sealants. They are not as durable as cement and epoxy mortars, but they have several advantages:
- mask defects in the facing material;
- resistant to moisture;
- possess antifungal properties.
Silicone sealants have a variety of colors, but they may turn yellow over time. The solutions are flexible, but with regular contact with food become loose and gradually begin to crumble.
Seams up to 5 mm wide are wiped with cement or epoxy mixtures. Large joints between tiles close up with compositions that contain sand. The additive increases the strength of the grout, but makes the surface of the seams rough. Sand solutions come in just two shades: gray and white.
The composition of high-quality mixtures should include:
- impregnation;
- varnishes;
- cement;
- latex.
The components provide elasticity and strength to the paste. In grouts for bath and kitchen should be antifungal substances.
Solution preparation
Beginners can buy liquid mixtures in construction stores that do not need to be diluted with water. It is enough to open the packaging and close up the joints. But the finished compounds are expensive and are stored less than dry powders for the preparation of solutions.
Usually, 250-300 ml of water are taken per 1 kg of dry mixture. For some manufacturers, the proportions differ from the standard. Before preparing the solution, you need to carefully study the instructions, which indicate the ratio of the workpiece and the liquid.
Grout mixed with water in a clean bucket or basin. If old cement or other mortars remain on the walls of the tank, they will react with the grout, its elasticity and tightness will decrease.
50-60 ml of water is poured into a bucket. A quarter of the grout is added, the mass is mixed with a spatula or with hands. The paste is brought to uniformity. Water is gradually poured, then a new portion of the powder is poured. The prepared solution is insisted for 10-15 minutes, and then applied to the prepared joints.
Liquid grout should not be stored for longer than 12-24 hours. It becomes covered with a film, becomes unusable. It is better to mix as much powder and water as you need per 1.5 square meters. m
Suture preparation
The gaps after removing the fixing crosses are cleaned of the remnants of tile glue and dirt. From the edges of the facing material with a spatula or clerical knife, the dried solution is scraped off. Instead of tools with an iron blade use a wooden stick. It does not leave nicks and scratches, but it slows down the process.
Tile glue is removed not only from the edges, but also directly from the seams. A spatula with a pointed blade or a screwdriver will do. The tool must penetrate to a depth of 5-6 mm. Clearances after processing with a spatula are cleaned with a stiff brush or a paint brush. She will remove the remnants of debris and glue.
Floors and walls after removing the hardened mortar are vacuumed. This is one of the best ways to clean joints from building chips, glue and dirt. After the gaps between the tiles wipe with a damp cloth or soft sponge. When they dry, proceed to grout.
If the surface of the tile is porous, the edges are covered with masking tape. Use a tape with a width of 3-5 mm, which is glued along the seams. It is difficult to wash porous ceramics from the remnants of the grout, it is necessary to paint over the stains with special compositions. It’s easier and cheaper to buy a skein of skotk.
Application and Tamping
The seams on the wall are overwritten after 7 days, when the tile adhesive has finally hardened. The gaps between the tiles are wetted with water before work. The liquid is applied with a thin brush. Moisture provides adhesion of the grout to the base.
Seams on the floor in the bathroom or kitchen are covered with gloss after a day. The owners of the apartment can not forget about the existence of these rooms for the whole 7 days. They regularly use the toilet, stove and sink, bring dirt and garbage into the room. It gets into the seams and reduces their hygiene and tightness.
The gaps between the tiles before grouting are treated with antifungal compounds. Preparations are applied after cleaning the joints from building glue and dust. Leave for a day until dry. Grout with a rubber spatula. Additionally, you will need:
- a bucket of warm clean water without detergents;
- large sponge with a hard surface;
- a cable whose diameter is 0.5 mm smaller than the size of the seam.
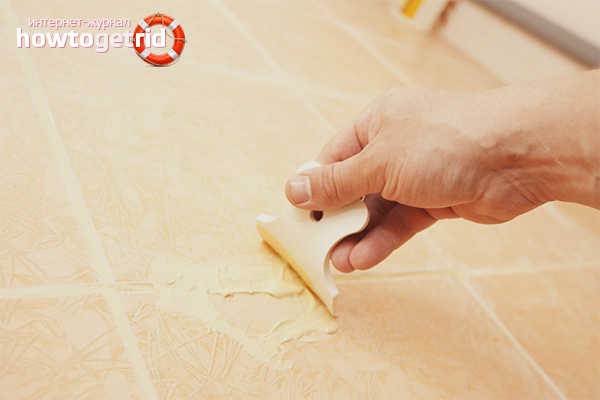
Thick paste for grouting the gaps between the plates is poured into a small tray or bowl, which is convenient to hold with one hand. The second compresses the spatula. Scoop a little mass with the tool and apply it to the seam. Tamp the grout with a rubber blade so that voids do not form between the dried mass and the wall. The smaller the portion of the paste, the easier it is to distribute it in the gap between the tiles.
Well-compacted grout is elastic and dense. Beginners will understand that there are no more voids when the spatula cannot penetrate the seam filled with paste. The tool will meet resistance.
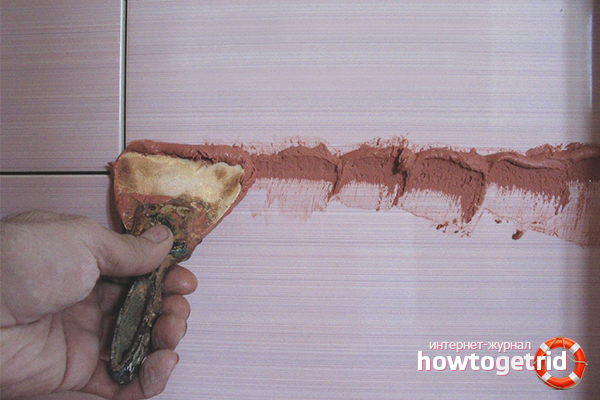
The remnants of the grout are removed with a spatula, which is installed perpendicular to the seam. The rubber blade moves slowly down or to the side. Excess paste is returned to the grout bowl. Divorces are not washed off immediately, but after 20-30 minutes.
The seams after processing are left to dry. The paste will take 20 minutes to become ductile. While the grout has not finally hardened, the formation and jointing of the gaps between the tiles is carried out.
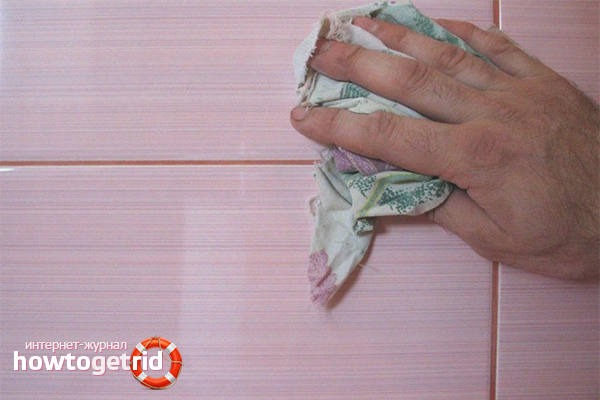
A clean sponge or rags are dipped in a bucket of warm water and squeezed thoroughly. If a lot of liquid remains in the rag, it will be absorbed into the grout. Moisture is the cause of bright spots at the seams. They stand out against the background of a paler grout and look ugly.
A sponge dipped in water is held along the gap between the tiles. A hard surface will remove the top layer of the grout, because it should be 0.2-0.3 mm lower than the edge of the tile. With a rag, they erase the rest of the paste from the ceramic surface until they are dry. After each treated seam, a sponge is dipped in a bucket and rinsed. Foam billet, on which grout remained, washes out the dried paste and leads to deformation of the seam.
Stitching gaps between tiles is not necessary.The procedure is intended for the formation of flat and smooth seams without depressions and pits. You will need a cable with a length of 15–20 cm. Wash the workpiece or wipe it with a damp rag before work so that no dirty stains or stains remain on the grout surface.
The cable is slightly pressed with a finger into the plastic paste and held to the corner of the tile. The grout that has come out of the seam is removed with a damp sponge. If the mass has become bumpy, it is necessary to conduct a cable through it a second time. The pits and depressions remaining after the embroidery are carefully sealed with fresh grout. A small portion of thick mastic is prepared and applied to problem areas with fingers. Press and leave to dry. If there is too much grout, areas that differ in color from the rest may remain.
Final processing
The mastic that has come out of the seams is swept away with a dry rag. Particles of the paste, which managed to dry, are removed from the ceramic surface with a grater. The tool resembles a wide scraper with a rubber nozzle in shape.
The grater moves diagonally. The wide blade is perpendicular to the seam. Pieces of putty, which are separated from the wall, are removed from the tool by hand. It is impossible for lumps of mastic to fall into the gaps between the facing material. They can damage the dried layer of grout, and you will have to re-process the seams.
Important: Removing dried paste from a relief or glossy tile is very difficult. The remnants of the grout are recommended to be removed immediately, before they have time to harden, and wipe the edges of the tiles with a rag or toothbrush.
The ceramic surface is cleaned of mastic residues with a damp sponge or rags. Wet grout removal is carried out after 20-30 minutes after removing the paste with a grater. The glossy gloss of the tiles will be returned with special solutions, which include:
- lemon juice;
- ammonia;
- table or apple cider vinegar;
- mustard powder;
- salt;
- Toothpaste;
- detergent.
One component or a cocktail of several ingredients is diluted with water. The sponge is moistened in the solution and carried along the wall. If a trail of grouting color remains on the surface of the tile, you need to wait another 10-15 minutes.
Sponge is carried out on a ceramic surface, removing the remnants of mastic. The foam blank is rinsed after each tile so that no stains remain. When the old solution becomes a dirty shade, prepare a portion of the new.
After wet cleaning, carefully examine the seams and fill the grooves remaining after the sponge. They wait until the grout dries, then polish the ceramic surface with a dry soft cloth to restore the tile to its former shine.
The mastic is covered with a layer of silicone sealant before final drying. Protective material must be used to process joints in the bathroom and kitchen. Translucent paste prevents the appearance of fungus. The sealant is applied with a thin brush if you need to process only the seams. Foam roller captures both grout and ceramic tile.
Clean and dry veneers are polished. Spray the surface with a glass and mirror cleaner, and then wipe the tile with a soft cloth until it starts to shine.
Even a beginner can fill the gaps between the facing material with mastic. The instruction will tell you how to cook a grout of the correct consistency. The hands will get used to the spatula in 5-10 minutes, and after half an hour the beginner will determine by eye how much paste to put in the seam. The main thing is not to be afraid of tools and implement recommendations to make it work.
Video: a workshop on grouting floor tiles

Submit