The content of the article
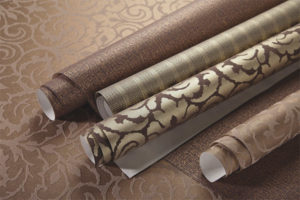
Cullets are expensive but universal material. They can be glued in all rooms, including the bathroom and kitchen. They can be washed safely, even with aggressive cleaning agents. But before operating to the fullest, you will have to try so that the fiberglass does not fall off the wall.
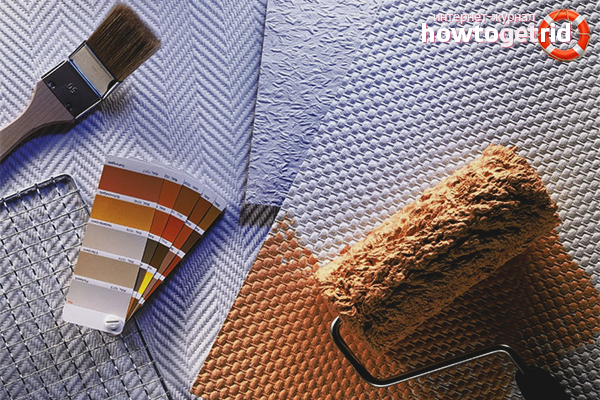
Today we understand how to glue the cullet for painting.
How to prepare a surface for cullet
Wall preparation is a very important stage. If we neglect it, then at one far from perfect moment the cullet will sadly fall off or be swollen with cheerful bubbles.
Old cover. If you are sure that the previous plaster, paint or putty is held tight, then special preparatory work should not be carried out. It is enough to make the wall slightly rough, and then cover it with two layers of soil.
Why so many times? Then, that cullet is a very heavy and dense material. If the adhesion to the wall is weak, then all the work will go down the drain.
All other previous coatings will have to be removed from the wall. Wallpaper, whitewash, water emulsion. These comrades have very poor adhesion. And impregnation with wallpaper glue will allow them to fall off the wall with a whole canvas. Together with fiberglass.
Be sure to wash off or clean off all this stuff. Then they putty again and cover with two layers of soil.
By the way, it is not at all necessary to putty to a perfectly smooth surface. Cullets remarkably hide all minor flaws, so do not particularly zealous.
New coverage. If you have to stick the cullet in the new building, then the walls will also have to be prepared. Plastering concrete walls is a must. Without it, the canvas will be difficult to glue evenly.
Sometimes people do not putty on a drywall or partition. There is no doubt, and without preparation, cullets hold perfectly. But the next repair instead of cosmetic will be capital. The canvases are torn off only with pieces of drywall. It is impossible to remove them separately.
Tip. It is better to play it safe and prepare the walls as expected. In the future, this will significantly save money, time and nerves.
What glue is suitable for glass
Run! Run from the seller who offers to buy universal glue! And then he will advise you of something "good". Cullets have a high density. Therefore, they weigh quite a lot. So glue should be appropriate.
Of course, a special mass is not cheap. But believe me, re-sticking will be more expensive. Moreover, if you find money in the family budget for the purchase of glass, then lay a certain amount on the glue.
On the package it should be written: "for fiberglass wallpaper." It will be ideal if the wallpaper and glue are bought the same brand. The manufacturer knows exactly how to stick the canvas qualitatively.
By the way, today the market offers a wide variety of adhesives. It is easy to get confused, but there are also fakes. Be sure to ask the store for a quality certificate. Then you definitely will not lose.
And further. Before purchasing, do not be lazy, read the composition. Glue based on starch - just a fake. He will not be able to support the weight of fiberglass. It is desirable that PVA be present in the composition. He holds all heavy types of canvases very well.
Tip. Correct glue cannot cost less than 500 rubles per pack.
How to breed glue for glass
This is not at all difficult. We look at the recommendation on the package. We measure the required amount of liquid. Pour about 600 ml into a separate bowl.Then we take in one hand a wooden spatula or a fun stick, we begin to vigorously interfere in a circle. With the other hand, gently pour glue into the water funnel. It is necessary to sprinkle with a thin even stream, without stopping. In this case, do not forget to constantly interfere with the mixture.
Then the glue is left for 6-8 minutes to swell. If you did everything right, then the finished glue is a very thick mass, similar to a cool jelly.
If the glue seems to you too tight in the finished form, then add the previously measured water and mix well. Just remember that it is problematic to glue fiberglass canvases on too liquid glue.
Tip. You are afraid to spoil everything and do not dare to induce glue on your own. Then your choice is special cullets with a ready-made adhesive layer. You only need to wet it with water and you can safely glue it directly on the walls.
How to glue painting wallpaper
In order for the fiberglass canvas to be painted, a colorless type of wallpaper is chosen. Colored wallpapers can shine through a thin layer of paint. A thick layer will smooth the entire texture of the wallpaper.
By the way, do not get fooled by the marketing ploy. Some sellers are actively offering cullet with fluffy fibers for painting. Of course, it looks beautiful and spectacular. But only in a roll. On the wall, when glued, a spatula or roller will “lick” all this fluffiness. And subsequent painting will completely hide the remnants of hairiness.
Wallpaper pattern does not matter for the quality of the paste. It is only a matter of personal choice and the proposed design of the room.
What is needed:
- Wallpaper and glue.
- Plastic spatula or rubber roller.
- Bucket or basin for glue.
- Wide brush. It is easily replaced with a straight-nosed roller.
- Glasses, gauze bandage, gloves.
What is 5 point for? Cullets consist of quartz “yarn”. And in some people it can cause skin irritation. Like glass wool. A bandage and glasses are needed for beginners. They still do not know how to even cut fiberglass, so the particles can fly off into the eyes or into the respiratory tract. It’s not very pleasant, but the cullets strongly crumble during cutting.
Procedure. It differs from gluing ordinary paper wallpapers only by applying glue. It is spread only on a wall 2 mm thick across the width of the canvas with a small margin. Measure the desired length in advance with an allowance of 7-9 cm. This small overspending is needed for accurate joining of the picture. Because fiberglass canvases need to be glued strictly butt. Overlap is allowed only with strong irregularities of the wall and subsequent cutting of the seam.
In order for the room after sticking not to be awry, a mark must be made before starting work. This is easy with any thread and heavy bolt. One person holds the plumb line by the ceiling, the second outlines the line for the start of gluing.
If the cullet is glued, which is called by eye, then subsequent painting will clearly show all the errors.
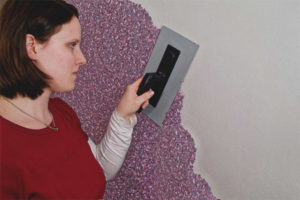
After the wall is plastered, the canvas begins to be glued from top to bottom. Do not stick the whole canvas at once. When smoothing the surface, ugly creases and bubbles may appear. It is better to smooth the glass with a spatula or roller from the center to the edges, gradually moving to the floor.
By the way, the porous structure of cullets allows excess glue to appear through the fiber to the front side. This should not scare you. And it is advisable to use such drops for simultaneously priming the surface of the wallpaper. Subsequently, the paint consumption will be less at times.
Simply putty glue is evenly distributed with a spatula or rubber roller, while smoothing the glass sheet. Particular attention is paid to the joints. They should be perfectly fitted so that they do not stand out against the general background of the wall. Do not be afraid that the glue will leave noticeable stains on the surface after drying. It will become completely transparent and almost invisible.
Key recommendations for maneuvers after completion of work:
- no drafts for at least 2 days until the canvases completely dry
- room temperature within + 17-24 ° С
- humidity no more than 75%
Some sources recommend that you prevent sunlight from entering the room. But what this precaution is connected with, we have not found an adequate explanation. What kind of wallpaper are these that are already at the beginning of their service afraid of the sun?
After 2 days, when the canvas is completely dry, you need to carefully inspect the walls. If air bubbles occur, fill them with glue through a regular syringe and smooth them out well.
You should also check the quality of the joints. If some detachments are found, then they are glued with PVA glue in the form of a pencil. Then carefully rolled with a roller.
Tip. Fiberglass canvas is always wrapped with the front side inside the roll. Outside is always wrong. Very often it is marked with a strip of neutral shade, so as not to confuse.
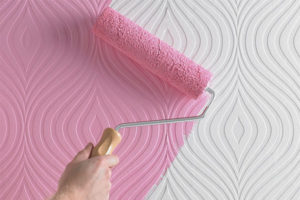
How to prepare cullets for painting
There is no need to dance with a tambourine. Everything is very simple. Wallpaper glue is induced in the usual way, only water is taken 2 times more than the recommended norm. After the liquid swells, it is applied to fiberglass canvases in a thin layer. Naturally, after gluing and drying.
It is very convenient to carry out the procedure with a short-haired roller or a wide brush. The first layer should dry, otherwise the second will slide into ugly lumps. Yes, yes, a second coat of primer is required. After all, you cannot be 100% sure of the quality of a single application.
After complete drying of all layers, you can start painting or painting glass.
Many neglect the priming of paintings. This is an inadmissible luxury. Fiberglass remarkably absorbs 2 coats of paint. And only the third will lie more or less evenly. Do not glue the wallpaper before painting - an extra waste.
Tip. Instead of liquid glue, you can use any other primer, the packaging of which indicates the possibility of applying to glass before painting.
Useful Tips
- Do not use rags or rags to remove excess glue. Quartz fibers stick to them and turn them into sandpaper. You will continue to rub the canvas with such a rag - you will get a scratched texture and noticeable stripes on the bottom of the sheet.
- Do not cut the entire roll into strips at once. In some houses, the height difference of the walls can be up to 20 cm around the perimeter of the room. You will then be tormented with a pattern of tiny pieces and an exact fit to the drawing. Measure each canvas separately. Avoid the headache.
- Cullets are much more convenient to cut with ordinary scissors. The usual clerical or construction knife can greatly crumble the edge of the canvas.
- For ease of application, choose glue with a dye in the composition. This will avoid gaps when applied to the wall. When dried, this adhesive discolors and leaves no residue.
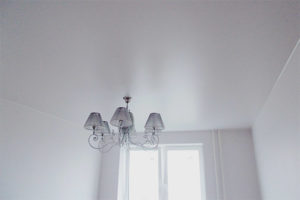
- For the ceiling choose cullets of lower density. This makes sticking easier. In addition, the ceiling is less susceptible to testing than the walls.
How to glue cullets for painting? Very simple. After all, this procedure is not much different from sticking simple wallpapers. It is important to attach the first canvas perfectly evenly. And then everything will turn out almost without much effort. Accuracy and diligence is the key to a good result and modern design at the end of the repair work.
Video: how to glue wallpaper

Submit