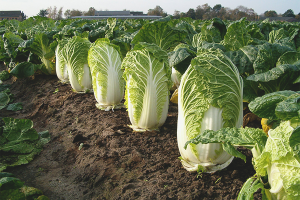
The content of the article
Buns are formed only on winter garlic. The spring variety does not have a core on which a basket with seeds should form. Seedlings derived from air bulbs have immunity to fungal diseases and insects. Growing strong and large garlic from bulbs is easy. The main thing is to collect planting material in a timely manner and store it correctly, take care of the seedlings and fertilize the soil in which they grow.
Planting material: harvesting and storage
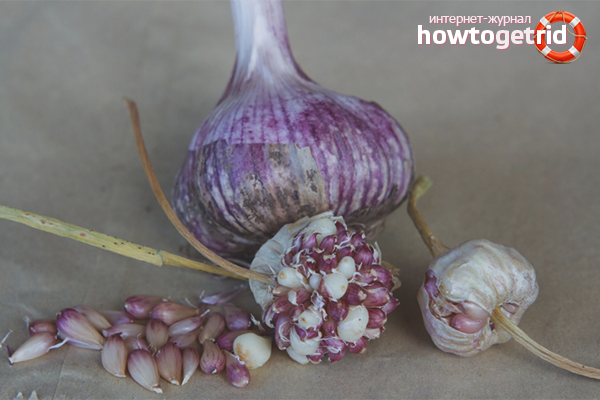
The structure of winter garlic is simple: 4–9 cloves and a stem that turns into an arrow. The variety is stored for up to 5 months, and then it begins to deteriorate. The winter variety intended for growing bulbs is planted in the fall. For 3 winter months, the heads have time to split into cloves.
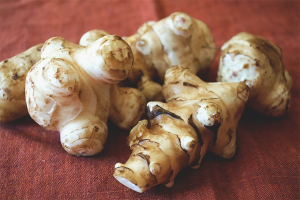
In summer, the stem extends, turning into an arrow, at the end of which an inflorescence appears. It is transformed into a basket filled with small air bulbs. The size of one bulb is not more than a penny. The cover of planting material is covered with a translucent film. It performs a protective function, and when ripe, it becomes cracked and bursts.
Ready garlic is dug along with the roots. Sheaves are formed from the workpiece, which are tied up with twine and suspended from the ceiling. Buns ripen in a dry room with good ventilation. The room maintains a positive temperature. Air bulbs love heat and tolerate heat normally.
Inflorescences will need a month for the plastic substances in the stems and leaves to go into the planting material. The baskets are cut after 4 weeks, trying not to damage the case. The shell is left on the stem, the seeds are inside the protective film.
The blank is poured into a bag from a newspaper or blank sheets. They are put in boxes filled with straw or paper, stored at + 20–25 degrees.
Right time
Muffins are planted in the spring and autumn. Experienced gardeners prefer the first option. In winter, the soil freezes, and some of the young bulbs die due to low temperatures and lack of nutrients.
If garlic was planted in the fall, the garden bed should be covered with dry branches and fallen leaves. It can be mulched with sawdust or straw. The top layer retains heat and protects the air bulbs from severe frosts.
If the gardener decided to leave the bulbs until spring, in February it is necessary to begin hardening of the planting material. Seeds are sorted out, discarding soft and empty specimens. Healthy and dense cloves are poured into plastic containers or wooden boxes filled with straw and taken to the cellar. You can put the container in the refrigerator.
Bullet stratification is carried out in another, more extreme way. The blank is poured into a fabric bag and buried in snow, left until spring. At temperatures from 0 to + 4–5 degrees, the air bulbs are activated and ripen.
Soil preparation
Garlic is not planted in areas where tomatoes or potatoes grew. Fusarium spores remain in the ground, which can destroy the crop. Former garlic beds do not fit. Good and thick shoots appear in areas where legumes, pumpkins, cabbage and herbs used to grow.
A spicy plant does not develop well with an overabundance of organic fertilizers. Manure or chicken droppings should not be added to the substrate, otherwise the seedlings will be thin and deformed with small and curved cloves.
Fertile and loose soil with a neutral pH is chosen. Fertilize the soil with humus: per 1 sq. Km. mtake 5 kg of make-up. Additionally, 20 g of calcium chloride and 30 g of superphosphate are added. You can add some wood ash. Sour earth sprinkled with lime. It will take 300 g of powder per 1 square. m
Fertilizers are applied in the fall. Dig the soil to the depth of the shovel, leave until spring. If clods form, they are not broken. In spring, the plot is leveled with a rake, and then fertilized with a garden mixture.
Preparing planting material
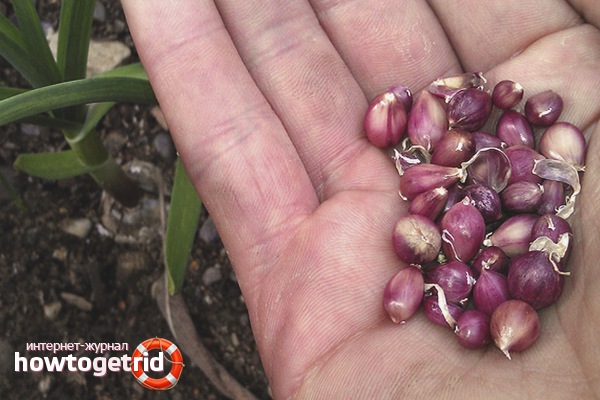
In March or April, a bag of air bulbs is dug up. The workpiece is dried and sorted. Spoiled specimens are thrown away, the rest are screened and warmed up to start the vegetation. Buns are soaked before planting in a weak solution of manganese. The tool disinfects and protects against fungus and pests.
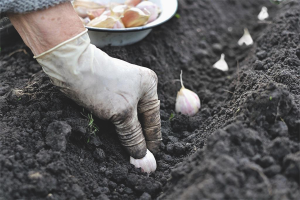
The bed is divided into several rows 60–90 cm wide. The length of the gap is 15–20 cm. A ditch is formed using a hoe. In spring, its depth varies from 3 to 4 cm, and in autumn - from 5 to 6 cm so that the bulbs do not freeze.
Air bulbs spread to the bottom. The distance between the cloves is 3 cm, a little more is possible. Planting material is not pressed in order not to damage. Sprinkle the workpiece with earth, rammed with a board. The substrate is sprinkled with peat. Mulching is carried out so that moisture is retained in the soil longer.
There is a second way of landing. The grooves are covered with wet sheets of paper. Newspapers can not be taken, the paint contains lead, which is absorbed into garlic and enters the human body, causing intoxication. In the holes make holes for air bulbs. Sprinkle planting material with sand, mulch with sawdust, and cover with soil on top. Thanks to the paper on the bed there will be no weeds for at least 1.5 months. During this time, the bulbs will sprout and grow stronger.
Care
Shoots fertilize three times per season. The first top dressing is made a month after the appearance of the first sprouts. A mixture of ammonium nitrate and superphosphate is used. For 1 square. m. take 10 g of each component. Fertilizers are dissolved in water and applied to the soil after weeding and heavy watering.
The second recharge is carried out on the 15th day. The amount of nitrate and superphosphate is reduced by 2 times. At the end of June, the last portion of fertilizers is being applied. Instead of chemicals, wood ash is used. For 1 square. m. take 300 g of powder, dilution with water is not necessary. You can sprinkle plenty of beds to destroy insect pests and enrich the soil with nutrients.
The earth is periodically loosened to a depth of 2-4 cm. The soil is saturated with oxygen, which activates the growth of air bulbs. The beds recommend weeding after rain to make it easier to remove weeds. It is necessary to ensure that the garlic area is always clean. Weeds pull useful minerals from the soil and slow the growth of bulbs.
In hot weather, garlic is hosed. The earth is moistened every 7-10 days.
Harvest
In August, the tops turn yellow and lie down. So the garlic has ripened. Buns for a year turn into bulbs with one clove. You can eat such a crop, but it is better to wait. At the end of August, garlic is carefully dug up, peeled, dried in the open air or in a ventilated room. Harvest periodically turn over so that it does not wound up a fungus.
Dry stems are cut, and cracked husk is removed from the bulbs. Store in bags or crates filled with straw. In spring, the cloves are re-planted in the ground and looked after, like for bulbs.
Tip: Sevki dig on a cloudy day. Direct sunlight damages garlic and shortens its shelf life.
You can do otherwise and leave the air bulbs in the ground by cutting dried leaves and stems. The beds are necessarily mulched with branches, leaves and sawdust so that the seeds do not freeze in winter.
Winter garlic buns are an ideal way of healing and updating varieties. Caring for air bulbs is easy. The main thing is to properly collect and dry the planting material, treat with disinfectants and put in prepared soil. Regularly weed and water the beds, and mulch autumn leaves or sawdust.
Video: winter landing of bulbs
Submit