The content of the article
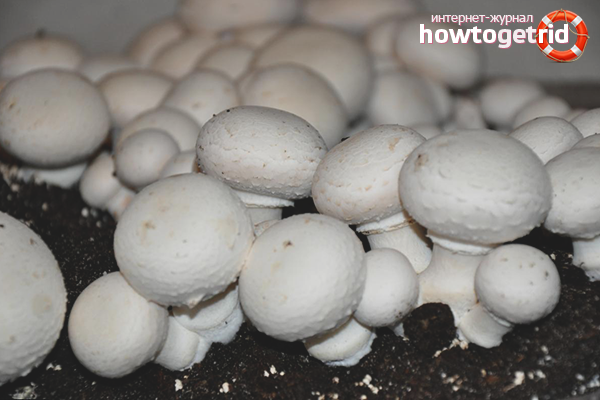
Champignons are considered the most common types of mushrooms, so there is no need to additionally advertise them. The product is widely used in cooking; on its basis, first and second courses, canned snacks, salads are prepared. Due to its high protein content, champignons are an excellent source of protein. Experienced gardeners prefer to grow mushrooms on their own, but the procedure has several features. In order to fully comply with the technology, it is necessary to adhere to step-by-step instructions.
What does yield depend on?
- The main factor affecting the yield is considered to be the implementation of the correct microclimate, in which the cobs begin to bear fruit. Timely watering, proper compost (correctly selected soil composition), and resistance to external factors, diseases, and pests are also of great importance.
- If you create optimal conditions, you can easily grow mushrooms all year round. First you need to choose a room that has a temperature range of 14-24 degrees. It is not necessary to take the starting place, the main thing is the ability to maintain the temperature (the presence of a heater or, conversely, a split system). In this case, the air humidity should not exceed the mark of 90% (humidity of 80-85% is considered an ideal option).
- An equally important factor ensuring proper yield is the circulation of air flow. Make sure that the selected location is carefully ventilated, it is important to ensure the flow of fresh air. Otherwise, the excess carbon dioxide released during the cultivation of mushrooms will result in a disproportionate leg (it will stretch unevenly).
- A positive feature of growing champignons at home is the complete lack of lighting. It does not matter, therefore, the procedure can be carried out in a cellar, basement or in a covered barn, where sunlight does not penetrate. Optionally, you can use the darkened free corners located in the garage or greenhouse. As mentioned earlier, the main thing is to ensure humidity and the required temperature in the absence of light.
- Since mushrooms are grown in a humid environment, it is important to immediately prepare for the possible spread of bacteria. Pre-treat the selected room with a composition of copper sulfate and lime, as well as formalin. Disinfection will kill existing microorganisms, so the likelihood of the spread of diseases will drop to a minimum.
- If you plan to grow champignons in the summer or in the fall, consider the option of carrying out the procedure on a summer cottage. Choose a dark place on the homestead field, select a separate bed, line the ground. Cover the mycelium with roofing material (can be replaced with polyethylene) to exclude the possibility of drying out or, conversely, excessive moisture. Such a simple move will provide the proper microclimate.
Stage number 1. Composting for champignons
- Compost means special soil that needs to be prepared to get a full crop of mushrooms. It is worth remembering that the soil is seasoned with organic compounds that play a major role in the cultivation of mushrooms, so you can not save on fertilizer.
- Composting is rightfully considered the most time-consuming process, and the final result depends on it. Mushrooms, in particular champignons, are highly dependent on the composition of the soil, for this reason it is necessary to observe proportions.Correctly composed soil consists of one part of moist straw and 4 parts of horse manure (the proportion of straw – manure is 1: 4).
- Lay out the compost in layers, alternating the two components alternately. To achieve maximum effect, line between the rows of urea or superphosphate in small quantities. Champignons will grow faster if horse manure is used specifically. However, in its absence, alternating straw with chicken droppings or processed waste products of other animals is allowed.
- Lined compost for ripening champignons should receive air from all sides, for this reason it is not recommended to lay it on the ground. Make sure that the soil is covered with a canopy, do not allow direct UV radiation or heavy rainfall. Of course, the compost should be moistened, however, excess water will interfere with fermentation.
- To get high-quality compost at the exit, prepare a shoulder for ripening. Its dimensions are approximately 1.5 m in width, 1.5 m in length and 1.5 m in height. It is this ratio that will ensure proper combustion. Do not compost in small quantities, as full fermentation requires large volumes.
- If we talk about the place of compost preparation, try to carry out manipulations in the open air. As a result of the fermentation of the substrate, ammonia and carbon dioxide are released. In cases where compost is being prepared indoors, provide good airflow and ventilation.
- The duration of compost ripening varies between 18-20 days. Knead and moisten the contents of the shoulder every 5-6 days to ensure proper combustion. During the first kneading, add chopped lime to the compost. During the second procedure - superphosphate, then crushed gypsum or alabaster is poured.
- Compost is prepared by fermentation, so its temperature values sometimes reach 53–70 degrees. Upon completion of the combustion process, the indicator decreases to the level of 21-25 degrees. One can judge the readiness of compost by smell, ammonia stench disappears. Ready soil has a brownish tint, elastic structure (when squeezed, it returns to its original position). The composition should not stick to the hands, while the straw breaks easily and has a soft structure.
Stage number 2. Composting and mycelium care
- After preparing the compost, you can start laying it. Choose containers for growing mushrooms, arrange the mass so that its height does not exceed 22 cm. As containers, you can use wooden boxes, bags, shelves or plastic containers.
- If we talk about seed, it is called mycelium. The composition is grown in a laboratory way, so to produce it yourself will not work. The product will have to buy. Mycelium can be composted and cereal.
- The first type has a high storage duration (about 10-12 months at a temperature of 0 degrees). You will need about 500 gr. compost mycelium per 1 sq. m. of soil. Grain composition is more effective, it gives a better crop. For 1 square. m. of soil it is necessary to add 330-350 gr. mycelium. At the same time, the product retains its properties for six months, you can keep it in the refrigerator.
- To sow, put the required amount of mycelium into compost (raise it with a layer), deepen the seed by 5 cm. The location of the holes represents a chessboard, each recess should be made at a distance of 25-30 cm from each other.
- If all conditions are met (compost temperature is about 20 degrees, air humidity is about 80%), the mycelium will develop in 15-20 days. During the ascent of the sowing composition, it is necessary to constantly moisten the soil and monitor the temperature of the substrate (the indicator should not rise above 40 degrees). Otherwise, the mycelium will die.To maintain moisture, cover with burlap or polyethylene.
- If you grow mushrooms in a summer cottage, there is no possibility to regulate temperature and humidity. When lowering the indicators, tightly cover the beds with a roofing material or a film.
Stage number 3. Ripening
- As mentioned earlier, the mycelium grows after about 3 weeks. You will learn about the completion of the process by the appeared web with a silver tint, it will come to the surface of the soil. At this point, it is necessary to achieve a temperature drop of 13-16 degrees and sprinkle a cobweb of 5 cm. Of the coating mixture. The mixture consists of lime powder and peat, it causes an alkaline reaction.
- To ensure productive ripening of the crop, throughout the process maintain the temperature within 13-16 degrees, humidity should be about 85%, while do not forget about good ventilation. Watering the soil is carried out drip using dispersing devices that provide uniform spraying. Such a move does not condense the substrate, but fully moisturizes it.
- If champignons grow in the country, protect the soil from direct ultraviolet radiation, and also do not allow overmoistening. Under the rays of the sun, compost will dry out or become very hot. At the same time, torrential rains are compressing the soil, as a result of which a large load on the mycelium will appear (its development will slow down or completely stop).
Stage number 4. Harvesting
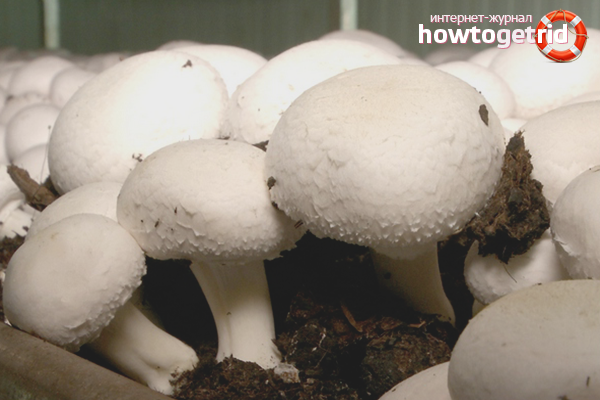
- You can collect the first champignon crop after 3-4 weeks. The cover peel will tell you about the readiness of the composition, it will begin to burst in the lower section of the mushroom cap. Champignons have the ability to ripen in stages, the first crop is the largest, then the wave subsides.
- To collect mushrooms, twist them counterclockwise, then carefully remove from the ground. After removing the fungus, sprinkle the resulting hole with moist soil. Make rotational movements carefully, otherwise you will damage the mycelium layer and young cobs of mushrooms.
- Collect all instances, even those that are sick or have a small size. Such a move will protect the subsequent crop from pests, as a result of which fruiting bodies will begin to develop many times faster.
- Throughout the entire fruiting stage, spray the room with potassium permanganate, diluted until a raspberry shade appears. You can also use lime at your convenience. Such a move will not allow pathogens to develop in humid conditions.
- If we talk about the quantity, from 1 square. m. you will collect about 6-13 kg. champignons. For 2-3 months, the mycelium will bear fruit about 7 times, after which the yield will drop sharply. It is forbidden to use compost repeatedly, they can fertilize the garden and the garden.
Prepare compost for growing champignons, get mycelium. Maintain the necessary temperature and moisture in the soil, harvest in stages. Do not use the used compound a second time. After harvesting, disinfect the mushroom containers and the room in which they were grown.
Video: growing champignons at home
Submit