The content of the article
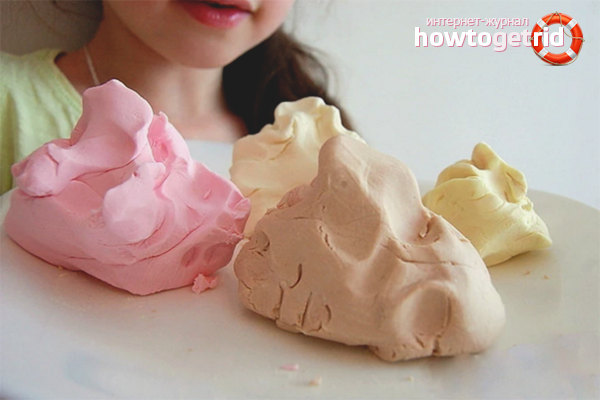
Plasticine develops motor skills of hands, as a result of which the coordination of hands and fingers improves. Modeling also helps children to think creatively and make logical chains. On sale there are many options for every taste and budget, but not all manufacturers guarantee the quality of their products. As a rule, plasticine contains harmful dyes and other additives unknown to us. Hence the need arises to prepare the mass for sculpting at home. Consider the important aspects in order.
The advantages of homemade plasticine
- The composition includes flour, which can be found in the kitchen cabinet of any housewife. Simple and cheap.
- There are no harmful dyes, chemical components, complex compounds and materials in homemade plasticine. Due to this, the composition is considered hypoallergenic, which is an indisputable plus.
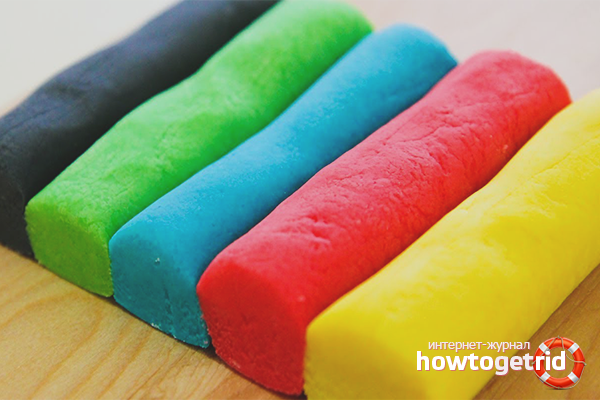
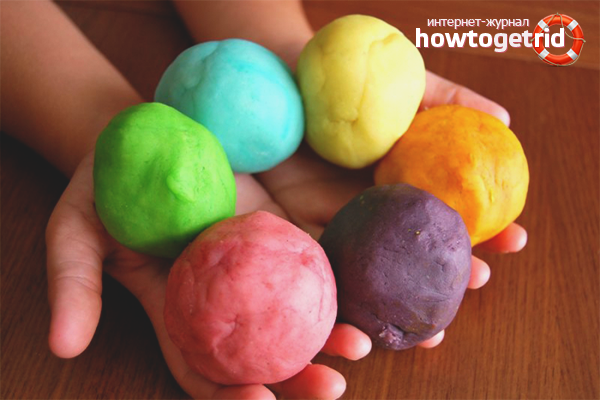
- When buying plasticine in a store, a child is deprived of the opportunity to learn color - mixing colors. In the case of homemade mass, this is quite real. By mixing red with yellow, you can easily get orange.
Plasticine composition
- Flour. Mass is based on this particular food product. Almost all recipes have flour, so you can not do without it. You can prepare clay from rye, oat, flaxseed, corn raw materials, but if possible the product should be whitish. As a result of this, it will be possible to make plasticine of absolutely any color.
- Salt. To plasticine retained softness for a long time and did not dry out, be sure to use salt. It absorbs excess moisture, which is formed from the addition of water, and then stores it inside.
- Water. By mixing the flour with the liquid, the very sticky consistency is obtained, which allows you to mold various details from plasticine, even the smallest ones.
- Lemon juice. Citrus acts as a preservative, it helps to keep flour and other food products in good condition for a long time. For this reason, plasticine does not mold, does not crust and does not have an unpleasant odor.
- Natural oil. The composition may include sunflower, corn or olive oil. The product makes the total mass plastic, provides reliable adhesion of flour to other components, prevents adhesion of plasticine to the hands and their coloring (in the case of the addition of dyes).
- Cream of tartar. Very often, people are perplexed when they first read the recipe. There is nothing supernatural; you can buy tartar in a pastry shop. It serves to maintain the shape of the final product, providing perfect ductility.
- Food coloring. As the name implies, the pigment performs a coloring function. It is much more pleasant and interesting to create original figures from multi-colored masses, and not from monophonic ones. Do not use industrial dyes, they are toxic. Choose only food confectionery pigment.
Plasticine recipe
For cooking you will need:
- white flour - 270 gr.
- chopped edible salt - 70 gr.
- lemon juice - 10 ml.
- corn or olive oil - 45 ml.
- filtered water - 130 ml.
- Pour water into an enameled pan, place on a stove and boil. Reduce heat, pour in vegetable oil, lemon juice and salt, wait for the crystals to dissolve.
- Pour the flour into a sieve, begin to carefully sift it into the pan, mix the composition with a whisk or a fork to avoid lumps.For convenience, you can do this not over boiling liquid, and the use of a mixer at low speeds will not be out of place.
- When the flour is filled, simmer the composition until it is completely thickened. Do not forget to constantly interfere, carefully collect the mixture from the walls.
- Sprinkle flour on the cutting table or board, pour the thickened dough onto the surface. Wait for it to cool to an acceptable temperature, and then mix the composition to a plastic consistency. At the end of the kneading procedure, plasticine should not be sticky.
- If desired, you can dye the mass in any color using food colors. The composition must be added at the moment when the paste is simmering on fire.
Microwave Plasticine Recipe
For cooking you will need:
- white flour (any) - 300 gr.
- ground salt - 150 gr.
- lemon juice - 15 ml.
- olive oil - 35 ml.
- purified water - 80 ml.
- Boil the water in the teapot, add salt to completely dissolve the crystals.
- Pour in vegetable oil and lemon juice, add flour, sifting it in a convenient way.
- Stir the mass with a fork or mixer, transfer to a microwave container.
- Cork the dishes, put in the microwave for 3 minutes with an average power of the device.
- After the time has passed, remove, mix, send the composition for another 2 minutes.
- After that, cool the bowl with the mass, do not open the lid.
- After about half an hour, knead the finished dough, pour 3 ml if desired. liquid glycerin to give shine.
Plasticine with citric acid
For cooking you will need:
- pure water - 440 ml.
- white flour - 420 gr.
- chopped table salt - 220 gr.
- citric acid - 25 gr. (2 sachets)
- corn oil - 30 ml.
- dyes (optional).

- Pour filtered water and corn oil into an enameled container, turn on the hotplate for maximum power. Bring the composition to a boil, when the first bubbles appear, turn off the stove.
- In a separate bowl, combine citric acid, flour and salt into one composition. Gently pour the mixture into a container of water. First, the flour will clutch with lumps that need to be crushed with a fork or the convex side of a tablespoon.
- Cool the mixture, then pour the flour on a flat surface and knead the dough until it stops sticking to your hands. If you want to add dye, then plasticine must be cut into small pieces.
- Put a pigment in the middle of each mass, then wrap and knead it. Be sure to do the work with gloves, the composition is poorly washed off the skin. Adjust the amount of added dye yourself, the more it will be, the richer the clay will be.
Tartar-based plasticine
For cooking you will need:
- white flour - 400 gr.
- drinking water - 220 ml.
- vegetable oil - 40 ml.
- tartar - 90 ml.
- edible salt (small) - 80 gr.
- liquid glycerin - 3 ml.
- food coloring (optional).
- Combine tartar, white flour and salt in one composition, pour boiling water with boiling water and add oil. Pour in the liquid slowly, stir constantly, because the mass will turn out sticky and viscous.
- After that, you can add glycerin, if at the output you want to get clay with a glow. Also at this stage it is necessary to interfere with food colors if there is a need.
- After mixing all the ingredients, cover the bowl with the mass of polyethylene, leave for half an hour. Then open the container, knead the dough until the plasticine stops sticking to your hands.
Starch-based plasticine
For cooking you will need:
- white flour - 430 gr.
- drinking water - 215 ml.
- table salt - 200 gr.
- sunflower oil - 45 ml.
- lemon juice - 20 ml.
- corn or potato starch - 30 gr.
- food coloring (optional)
- PVA glue - 100 ml.
- sodium tetraborate - 10 ml.
- Combine the salt with white flour, sodium tetraborate, and starch. Boil water, carefully pour the liquid into the prepared dry mixture, at the same time mix to prevent the formation of lumps.
- Add oil, lemon juice and glue, begin to mix thoroughly for a long time and thoroughly until a viscous consistency is obtained.
- At the end of the action, cut the clay into pieces, make a small hole in each of them with your finger. Put on gloves, drip food coloring in the middle, knead the dough until it is completely stained.
- As in previous cases, you can add liquid glycerin at the time of pigment infusion. Such a move will exclude possible staining of the hands during the sculpting process; the clay will be brilliant.
Regarding the storage of home composition, the mass can not be kept longer than a week, after this period it becomes covered with a crust and loses its plasticity. If possible, store the plasticine in a tightly closed container or plastic bag in which air does not penetrate. The composition must be kept in the refrigerator or dark cabinet.
Video: how to make plasticine


Submit