The content of the article
Modern candle making is not only the production of necessary household items. This is a real art, amazing flight of thought and unlimited imagination. Modern candles are real elements of decor and interior design that can easily replace works of art. Today, making candles has become a favorite hobby among many people. The thing is that candles are made easily, do not require a lot of expensive material, but the field for imagination is endless.
What you need to make a candle yourself
To make a candle, we need paraffin. It can be bought in specialized stores for needlework, as well as in hardware stores. Paraffin can be taken from old, unburned or broken candles. Instead of paraffin, you can take beeswax. It is a natural material that, when burned, cleans and disinfects the air. However, it does not lend itself to coloring and aromatization. Recently, soy wax is gaining popularity. It freezes quickly, burns for a long time and is easy to clean.
Pay attention to where you will work. Prepare your workspace and cover it with old oilcloth or newspaper. We will need a pot for a water bath, an old bowl, a wick and a thermometer. As a wick, you can use a thin rope or a paper tourniquet. You can decorate a candle with decorative elements - Christmas tree branches, shells and beautiful stones. Do not forget about dyes - it is better to use oil-based dyes, food colors will not work. By adding aromatic oils at a certain stage you give the candles a special charm - when burning a pleasant smell will come from them.
How to make a candle
- Pour water into a saucepan and put on fire. It will be needed for a water bath. It is impossible to heat wax on an open fire - it burns and evaporates.
- Grind the paraffin into chips and place in an old aluminum bowl. Keep in mind that paraffin is practically not washed, therefore it is advisable to have a separate vessel for making candles.
- Paraffin needs to be planed, do not put wax in one piece - it will melt for a very long time. Place a small bowl in a pot of boiling water and wait for the wax to melt.
- Just in case, have warm soapy water and a damp cloth on hand. If wax gets on a table or stove, it will need to be wiped immediately.
- Use a thermometer to heat the wax. In craft shops they sell a special thermometer for making decorative candles. If you did not find such a thermometer, you can use the usual confectionery counterpart.
- Wax usually melts at a temperature of 85-90 degrees. It is very important to monitor the temperature so as not to overheat the wax. If you allow it to warm more than expected, it can begin to boil, and then just ignite.
- Wax smelting is a fire hazard process. Carefully monitor the melting of paraffin and do not trust the process to children without adult supervision. If the wax has caught fire, it must not be extinguished with water; use a rag for this.
- If you stoke wax from old used candles, you need to pay attention to whether there are old wicks in the mass. If necessary, remove them with forceps.
- When the wax becomes liquid, you need to add flavor and color to it. You can add several colors and do not mix much to get a candle with multi-color stains.
- Prepare a candle mold. Typically, the form is a glass cup with transparent or patterned walls.It is necessary to fix the wick in it so that it is in a direct state strictly in the center. To do this, one end of the wick must be fixed on a round tin plane the size of a penny. The second end of the wick is tied to a stick that holds it upright.
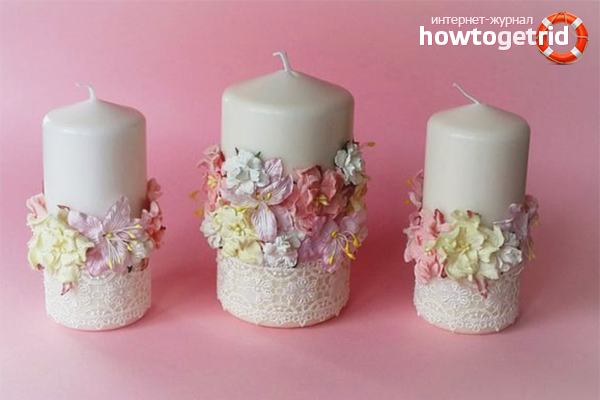
- If you want to dilute a candle with decor, it's time to fill them with a form. It is best to place them as close as possible to the walls of the mold so that they can be seen after the wax has set.
- The wax mass is carefully poured into the candle mold. In this case, make sure that the wick does not move.
- Wax and paraffin congeal depending on the density of the raw materials. Usually homemade candles freeze for 10-12 hours. But it is best to withstand the day, the longer the candle hardens, the better it will burn. You do not need to put a candle in the refrigerator.
After solidification, you can use a candle. Before this, do not forget to cut the wick, leaving a small tail for burning. The candle can be pulled out of the mold or left for use directly in it. Self-made candles can be a pleasant and original gift.
It is interesting! If, during the preparation of a candle, add citronella aromatized oil to the wax, the candle will drive away mosquitoes during combustion. This is a safe, simple and effective method of protection against annoying insects.
How to make a gel candle
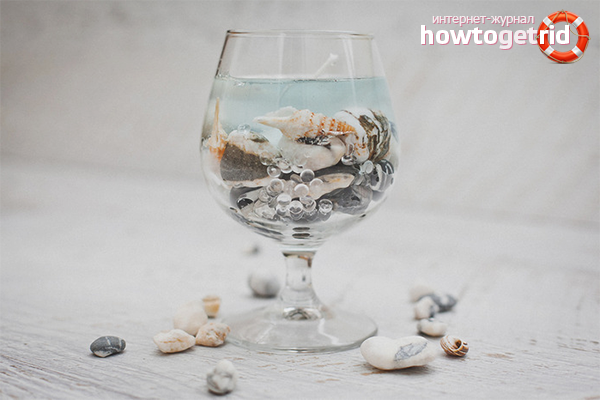
Gel candles are gaining popularity due to its lightness and original design. Decorating gel candles is a pleasure, because the transparent structure allows all decoration elements to be visible. Consider how to make a gel candle.
- In the store for crafts and needlework you need to buy a special gel for making candles. It can be transparent or colored. You can mix several colors to get the desired shade.
- We drown the gel in the same way as paraffin. The gel becomes liquid at 100 degrees.
- In the prepared form, lower the wick in the same way as in the previous description. Lower the decorative elements - buttons, slices of dried citrus fruits, toys, beads - anything. Please note that items for decoration should be non-flammable.
- Pre-wash the decorative elements and dry them dry. Some decorations can be put to the bottom, while others can be added to the candle as the molten gel is poured. They will remain as if floating in space.
- Arrange the decor elements so that they are not located close to the wick. Keep a distance of at least one centimeter from the wick.
- Sometimes, after the candles solidify, bubbles form inside the gel. To prevent this, the form must be heated. This can be done by lowering it in hot water or using a hairdryer. If you dipped the mold in water, do not forget to dry it after that. In case you, on the contrary, want to decorate a candle with many bubbles and focus on this, you need to cool the form previously in the freezer.
After solidification, the gel candle cannot be used earlier than in a day.
Interesting ideas for making candles

- As an interesting idea, you can use a gel of several colorful shades. To do this, pour a little gel on the bottom of the mold and wait a few minutes until it sets. Then pour a different shade of gel into the container. So you can combine colors and make a bright striped candle. If you want the colors to have a smooth transition, you do not need to wait long for the solidification. In this case, they will mix at the border of the color. If you want to get clear boundaries, it's worth the wait. However, do not overexpose the composition, otherwise, after completely hardening, a whitish film may form on the surface - it will ruin the appearance of the candle.
- You can make a natural candle from lemon zest.To do this, cut the lemon in half, carefully cut the pulp. When melting in the gel, add cloves, lavender essential oil and a sprig of rosemary. The melted gel must be poured into a mold and allowed to cool. It will turn out a beautiful and fragrant fruit candle.
- To give a pleasant aroma from a finished candle when burning, you need to add coffee beans to the molten wax. After you pour the wax into the mold, decorate the top of the candle with an original grain pattern.
- You can make a candle with your own photos. To do this, print a photo on tracing paper and cut out the image. After that, attach the picture to the candle and heat it with a hairdryer. After a while, the pattern will begin to translate into a candle. So you can make candles with any pattern or picture.
Refined decorative candles can change the atmosphere in the house. DIY candles make the interior warm and cozy.
Video: how to make transparent gel candles


Submit