The content of the article
A wine cellar is not the only way to equip a basement or basement, but one of the most popular. Therefore, it is he who causes a lot of questions, including the one on how to properly make ventilation. It is vital because allows you to maintain a given temperature in such a room, and most importantly - the humidity level.
Features of basement ventilation
It is worth noting that the air circulation in the residential part of the house, and in the basement is fundamentally different. If there are windows in the common rooms and doors that allow them to be ventilated, then there is no such possibility under the ground, where the cellar is usually located, and in this case it is necessary to use special means or technical solutions to force the movement of air masses naturally or artificially.
Ventilation in the cellar will be organized immediately during construction. If for some reason this did not happen - no problem. This can be dealt with later in the process of operation, visually taking into account the peculiarities of the climate, levels of freezing of soils and occurrence of groundwater.
Types and options for their modification
The basic design is simple and has a number of execution methods, which partially depend on the layout of the building and the cellar, in particular. Distinguish ventilation designs depending on several parameters:
- The use of electricity;
- Connection to a common ventilation system;
- Organization of the air flow.
Air circulation systems fully or partially powered by the mains automatically go into the category of models with artificially stimulated air flow. Otherwise, the system will be natural.
If the air flow is controlled through a common panel, then the ventilation will be centralized and volatile.
The last criterion allows you to divide into designs that perform exclusively inflow, exhaust air, or at the same time mixing both processes (the most common method).
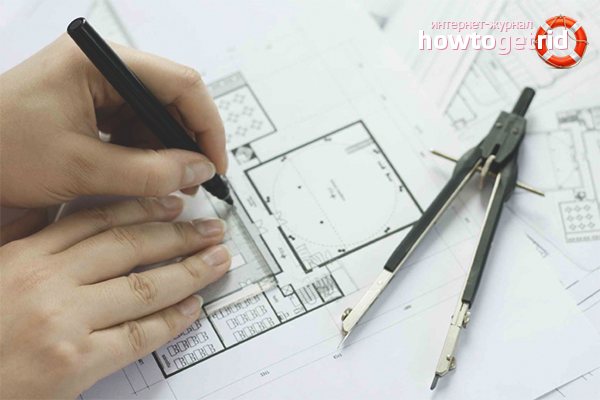
Structural planning and design
Before starting the selection of materials, it is necessary to make the appropriate calculations and determine what load the system will be designed for. In this case, you need to determine the length of the duct and its diameter. Based on the obtained parameters, the need for additional stimulation of the air flow is determined. For example, when choosing one of the automatic systems that are often used in residential buildings, you only need to check the specifications of the device and check the permissible volume of the room for which it is designed. Such ventilation options are usually made in the form of a monoblock or consist of a set of related elements. At the same time, they can only mix the air available in the room or additionally carry out air exchange, drainage, or, conversely, humidification.
Ways to lay pipes or ducts are calculated so that from the start to the end point there is a minimum number of bends / elbows (ideally 0). They reduce ventilation efficiency.
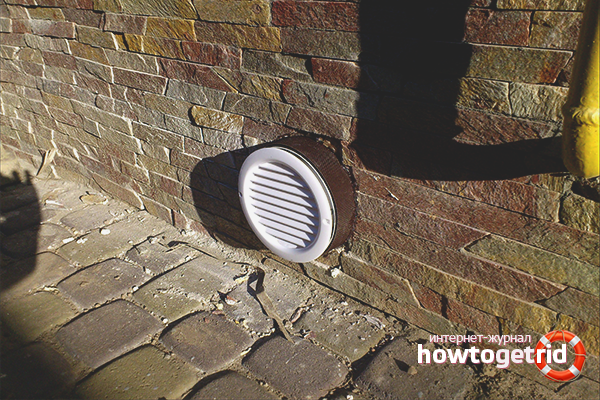
When laying a system with natural circulation, it is necessary to additionally take into account the physics of air flow. Cold air will flow through a hole that is usually located at ground level or deeper. It will fall down, so the distance from it to the floor can be in the range from half a meter to 20 cm.To do this, a supply pipe is mounted to it, and also a part is brought out of it above the ground, additionally providing it with a protective grill.
The outflow of air is also equipped with a pipe, the end of which is led out over the roof. Its visible part should be from half a meter to 40 cm long. The end is additionally equipped with a deflector that protects the structure from moisture and creates a section with reduced pressure. Thus, the air is physically pulled out.
Procurement of materials and their preparation
The most difficult in the selection of materials is the choice of the desired pipe diameter. If you approach the process with the utmost scrupulousness, you can find a whole set of formulas to determine their cross section. But in most cases, the home cellar does not have large dimensions (up to 8 m2), so a universal option of 12-15 cm is selected. In this case, the hood should have a smaller cross section than the influx.
If you delve into the process, then for each square meter of the room you will need a 26 cm2 duct cut. The total area must be multiplied by the section and divided by a factor equal to 13 (section per 1 cm2 of 2 pipe radii). The resulting value will be equal to the average diameter of the pipe.
In addition to dimensions, the materials used should be considered. Ideal are polymers (plastic) and asbestos cement. They have a greater thickness than metal and high wear resistance. Iron also lends itself to rust, which quickly manifests itself in the moist air of the cellar, and steel pipes have to be additionally insulated so as not to degrade the quality of the traction. Thus, additional spending is generated.
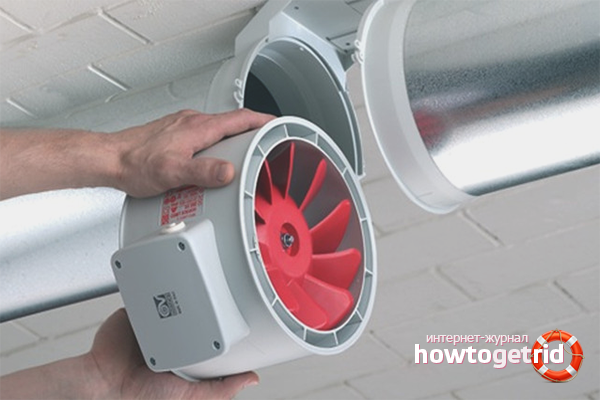
In addition to pipes, baffles and grilles, a number of auxiliary elements may be needed. These are fasteners, and, if necessary, tools, for example, for welding PVC pipes. Also in some cases, you can add a diffuser to the top of the hood. It is made in the form of a weather vane, which rotates under the influence of wind and enhances traction. Such an element can be considered as an alternative to electric fans that are installed inside the pipes or at their ends.
Modern ventilation systems programmatically control such elements. Digital sensors monitor the temperature and humidity in the room and, if necessary, start one or another channel fan located inside the supply or exhaust. Such modules must be individually selected for the diameter of the pipes.
Mounting elements
Assembling a new one or modernizing an existing ventilation system can be carried out both independently and with the involvement of professionals, depending on existing skills and related equipment. If the prospect of climbing the roof is not good, then the choice is obvious.
Air ducts can be installed in any order. Installation of the hood is carried out one and a half meters from the floor under the ceiling. Due to the fact that moisture condenses most often on this channel, a tap is installed on the edge of the pipe to drain the water. The air intake hole is made slightly higher. It is advisable to mark a valve inside the exhaust duct that prevents the penetration of cold. If the budget is somewhat limited, instead of a fan inside the hood, you can mark an incandescent lamp, which will additionally heat the air.
Save on grids that are mounted on the tributary is not worth it. Without them, the system will not be protected from the penetration of rodents and even bats.
It is also worth considering that the placement of the hood and inflow should be on diametrically opposite parts of the basement. Otherwise, the system will be extremely inefficient.
Both channels must also be equipped with dampers that can stop air movement or significantly reduce it. When choosing factory-made products, you can choose an already finished option.
At the final stage of the installation, electrical elements are connected. They can be powered from a small power supply unit or directly from the mains.However, the most important thing is that the fans and other similar elements are adapted to work in high humidity conditions and insulated to prevent short circuits.
The final chord of installation can be called a test of the system. This is easy enough to do. To do this, you can use a thin piece of paper, lit by a match or a lighter, which are brought to the openings of the exhaust and inflow. If the work is done correctly, the flame or piece of paper will move in the direction of flow. Those. with open latches, the leaf will begin to repel from the inflow, and be attracted to the hood, being in close proximity to them.
Parting words
If this is your first experience in such works, do not plan to complete everything in a short time. In a hurry, you can miss very important details, after which you will have to rework the design, and return to the starting point. If you evaluate the entire front of the work as a whole, then with the correct distribution of processes in time and effort, you can do these jobs with your own hands.
Video: do-it-yourself cellar ventilation


Submit