The content of the article
The market of household tools in Russia has recently experienced a boom: more and more people are doing repairs in their apartments with their own hands, and therefore they need practical, inexpensive and convenient tools at the same time. And these include glue guns that are gaining popularity among the average buyer, which find their application not only in the field of repair, but also in the areas of needlework and design.
The popularity of glue guns is explained by the relative low cost of these tools, coupled with a wide area of their application; So, with their help it is possible to glue a much larger amount of materials than ordinary PVA glue or universal “Moment”.
Important: some difficulties may arise when bonding polystyrene, various substances containing polyethylene, and any objects with concrete or plaster.
Every modern person should know how to use a glue gun in order to be able at any time to quickly and reliably repair any thing, to repair a small crack that has appeared, or to temporarily connect the two ends of a broken wire.
The principle of operation of the glue gun
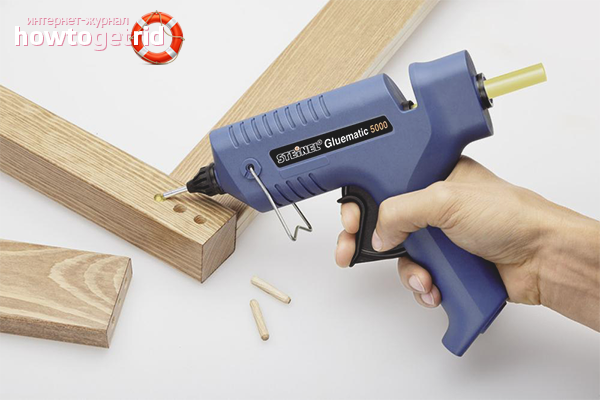
Obviously, this tool is called a pistol because of the similarity in appearance with a firearm "brother": a case that actuates one or another mechanism, a lever, a handle under the girth of the palm - all this is very similar to military weapons. However, inside the glue gun there is a heating element, which, taking “cartridges” from the back, special cylindrical rods, heats them to a predetermined temperature, thus melting them.
Important: the working temperature of the tool is, on average, 160-170 degrees, the melting temperature of the rods, on average - 125 degrees. The high operating temperature provides faster melting and advancement of the glue-like mass with the help of a metal screw forward to the bow of the tool. Professional builders advise turning off it for a short time after every hour of using the gun.
Since the high melting speed provides a quick exit of the heated mass from the nozzle of the device, it is necessary to ensure that a special rubber tread is installed on its nose, which is necessary to prevent burns.
On some models, a little more advanced than the budget class products, special special rubber bushings and inspection windows can be installed, the purpose of which is the ability to establish control over the movement of the glue rod in the device body. These components are needed only if the glue gun is used not only for emergency gluing of any substances (for example, to create models of ships, etc.).
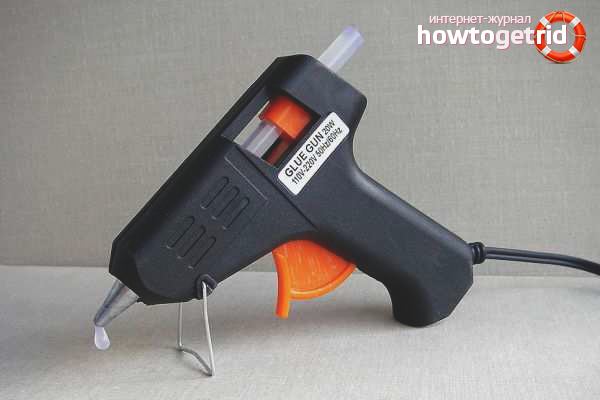
Manufacturers of glue guns also provide a choice of the gun’s operating mode: there are both “stationary” ones that work only from the mains and portable ones, in which the battery is built-in, as well as professional ones that can work both from the mains and from a removable battery at the same time (in a word like most screwdrivers).
Tip: if a glue gun is needed exclusively for domestic needs, then it is recommended to purchase one that works from the network. In most cases, such models will be significantly cheaper.
Using a glue gun
The glue gun belongs to the category of “folk” household tools, the use of which is very simple and understandable to every person.So, the first thing that is recommended to be done is to prepare a workplace for gluing materials, for example, to lay an old newspaper or paper folded in several layers. Although the jelly-like glue is easy enough to remove from the surface, it can leave a small noticeable burn mark.
Tip: if the glue mass moves too fast inside the body, you can not keep track of its fall from the nozzle of the device and get a burn; therefore, it is always recommended to work in special gloves.
The next step is to prepare the tool for melting. The glue cylindrical rod must be inserted all the way into a special hole on the back of the device; if it constantly falls out due to its long length, it can simply be cut into several smaller parts.
Then the glue gun must be neatly installed on the hinged stand, which either comes complete with the tool, or is located directly in its body. After that, the device can be connected to the network and put into active mode by pressing the appropriate button. Any glue gun needs several minutes to heat up, the duration of which depends on the brand of tool, class, and type of glue stick.
Important: you should always pay attention to the rod used for melting. The higher the temperature of its melting and, consequently, solidification, the better, since certain materials must reliably grasp and hold at any ambient temperature.
During the time that the thermocouple heats up, it is necessary to prepare the surfaces of the materials for gluing: clean them from grease, dirt, dust, etc. The presence of any extra components will worsen the bond between the weld particles, as a result of which it will be not even, but curved; a large number of bends can lead to its rupture.
As mentioned above, the greater the force exerted on the drive lever, the more intense the glue-like mass will “come out” of the nozzle of the device, therefore, if the device is used for the first time, it is recommended to practice on things that you do not mind spoiling.
The gluing process should proceed in several stages:
- First you need to set the gluing surfaces as close to each other as possible while supporting them firmly on both sides.
- With a glue gun, either draw a thin line or draw several glue points (depending on the glue area). If it is necessary to glue some narrow object, it is recommended to use the first method, in all other cases - the second.
- When the line is drawn, it is necessary to maximize the intensity of the adhesive output to the gluing surface so that it does not have time to dry out a bit. If the drip method is used, it is recommended that the gluing be done gradually, pressing each section in turn. It is extremely important to pay attention to the joining of the two materials, so that subsequently it would not be necessary to remove the excess glue squeezed out of the space between the glued surfaces.
- After squeezing the two gluing surfaces, they should be kept in a fixed position for at least 2 minutes, preferably 3-4 (this is what almost any glue needs to cool and dry).
Types of hot melt adhesive
The cylindrical rods that serve as "cartridges" for the glue gun, as mentioned above, differ in several parameters, from which you must make a start when choosing. In most cases, the instructions for the gun always indicate the recommended models, but trusting the manufacturer is not recommended, since the most fusible options are often indicated.
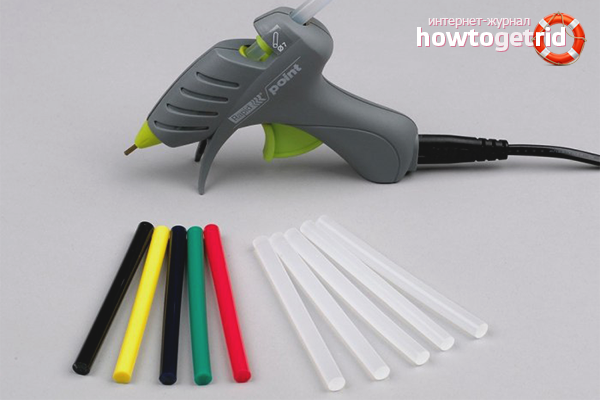
Hot-melt adhesive can vary in diameter and length of the rods: the classic version is a diameter of 7 mm and a length of 10 cm. If the value of the last parameter is greater, it is often simply inconvenient to use, and the interfering part is cut off.
Cylindrical rods of various models and brands can be made of easily and refractory materials, the melting temperature of which can vary in the range from 90 to 150 degrees. It is recommended to select those rods whose melting point is about 125 degrees.
Important: before buying a hot glue, it is imperative to familiarize yourself with the parameters of the glue gun, especially with the technical characteristics of its thermocouple.
The manufacturer is always obliged to indicate the maximum temperature reached by the device.
It is well known that cylindrical rods also differ in color. And in this case, the color is not a whim of the manufacturer, but an indicator showing why this or that type of glue should be used. For example:
- The white transparent core is universal and suitable for gluing any materials (like all painted transparent ones).
- The white opaque rod should only be used for gluing metal objects and glass.
- Yellow is used to glue paper, cardboard and wood, often being the most hot-melt adhesive.
- Black, gray and, less commonly, dark violet are used to fill cracks, voids and any holes, playing the role of sealants and, less commonly, insulating materials.
Finally
When working with the device, it is important only not to forget to observe certain safety measures: the nozzle of an unused gun should always be pointing down, it is recommended to install the tool on a stand in order to eliminate the risk of it falling and, as a result, ignition. When working, hands should be protected with a dense cloth: gloves, gloves, etc., in order to prevent the occurrence of burns in case of negligence or malfunction of the device.
Since part of the adhesive, even a small one way or another, will remain on the nose of the gun, after cooling the thermocouple and the body of the device, it should be removed so that it does not cause stagnation and accumulation of jelly-like mass in the future.
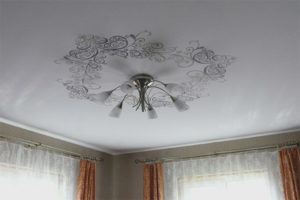
A glue gun can be used not only in construction and domestic needs, but also as a tool for creating decor items: with it (as well as fusible cylindrical rods), you can combine natural and artificial materials, creating an original composition, collage and even toys.
Video: how to use a glue gun


Submit