The content of the article
You must admit that it is insanely pleasant to wake up in the morning and get up bare feet on the warm floor. Especially when snow fell outside the window at this time. You go to brew yourself a cup of aromatic coffee, take a seat in front of the window and look at the snow-white landscapes. Do you want also? Then read the article further and learn how to make a warm floor in your private home.
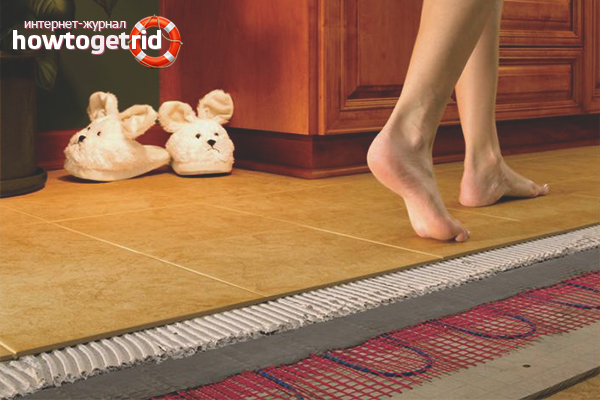
Type of warm floors
If you have already purchased a floor heating system, skip this section and proceed to the next. The rest of the information written here will be helpful. There are two main types of warm floors:
- Water;
- Electric
Both have enough of their advantages and disadvantages. Therefore, it is worthwhile to dwell on each of them separately.
Water floor heating
By the name you can guess that the floor is heated with water. Indeed, pipes are laid under the floor to circulate hot water. It is worth noting that for private homes, this system is a more popular electrical analogue. However, let's look at why.
So, the advantages of a water floor over an electric analog and a conventional radiator are:
- Comfort. The water floor does not dry out the air at all, and the heat is distributed evenly from floor to ceiling.
- Partial independence from electricity. In the event of a sudden power outage, the floor will continue to produce heat for another one to two days. Despite the fact that the water circulation stops and the heating elements are turned off, the liquid cools for a very long time.
- Radiators are traumatic and can leave a serious burn. With a system of underfloor heating, this is absolutely impossible.
- Freedom of space. All heating components are under floor covering. Accordingly, the radiator can be sent to the trash (or to the closet if you are too economical) and free up additional space.
- Compatibility with other heaters. Frozen will especially like this item. Underfloor heating can be used in conjunction with other heating methods. It is worth noting that this also applies to electric floors.
An impressive list, isn't it? However, like everything that surrounds us, a warm water floor has its drawbacks, which should be known in person.
- It has already been said that the floors cool down for a long time. However, there is a flip side to the coin. They also heat up for a long time. To get the optimal temperature, they will need at least a day. Accordingly, to install the system in a country house, in which no one constantly lives, there is no point.
- The next drawback is a little off topic. But if the article is read by apartment owners in a multi-story building, the following information comes in handy. So, it is forbidden to install a water floor in such housing. This is due to the fact that this increases the level of hydraulic resistance.
- Sophisticated installation compared to electronic counterparts. More on this later.
- If a hole is formed in the heating pipe, it is unlikely to identify a specific place. Therefore, you have to disassemble all the flooring.
After that, you can draw any conclusions. However, the final choice should be made after the description of electric floors.
Advantages and disadvantages of electric floors
In contrast, from the above system, there are 3 types of electric underfloor heating:
- Heating cable. A simple system, but you need to install a screed on top of it.
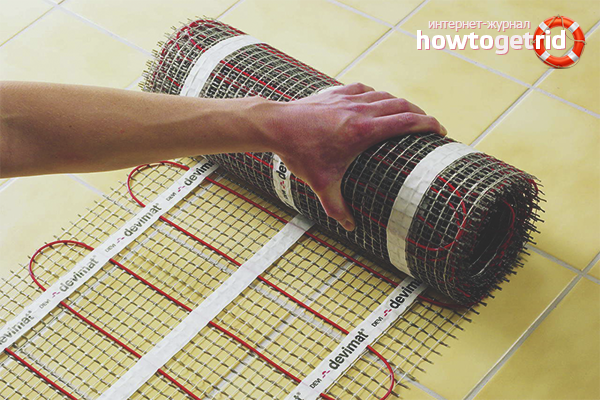
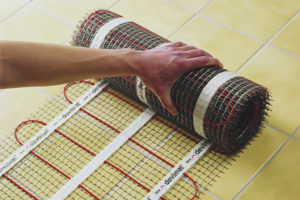
- Special mats. The same cable, only on a special grill. It costs more, but there is no need to carry out a complete repair and make a screed.
- Heating film (infrared heating). It is installed directly under the floor covering and consumes less power. However, in rooms with a large area, such a system is less effective.
Now consider the main advantages of such floors:
- Such a heating system does not dry the air and creates a favorable microclimate even for people with lung disease.
- The room begins to heat up in a few minutes after switching on.
- Maintaining and changing the temperature is easy enough. There is a special thermostat for this. In the case of water floors, it is also present, however, to change the temperature will require a much longer period of time than here.
Now the flaws, or rather the flaw. Yes, he is only one, but for some it is very significant. It consists in increased energy consumption. On 1 sq.m. approximately 110–150 watts are consumed. However, with the help of temperature controllers, this indicator can be reduced to 70-100 watts.
Perhaps, of the real minuses - that's all. Of course, it can be noted that many talk about harmful radiation from heating mats. However, in reality this is not supported by anything.
So, all the pros and cons of each system are disclosed. Now you can make a choice, go to the store and read the following sections.
Installation of water floor
Have you chosen a water floor? Perfectly. However, it is worth remembering that for its installation you will need to make a concrete screed. Can it be made in a wooden house? Absolutely not. However, there is a way out and it will be described a little later.
Installation in a brick and concrete house
To begin, consider the classic installation option. So, before laying pipes, an additional series of measures should be taken.
- First, the main surface of the floor is leveled and cleaned of debris. Further, the coating is covered with a layer of waterproofing. For this, dense polyethylene is suitable, the seams of which are glued with double-sided tape.
- Probably everyone wants the system to have high heat dissipation and only go up, that is, to heat the room. For this, a layer of thermal insulation is laid out on polyethylene (foil side up). For more convenient styling, it is recommended to stay on tougher materials.
- Then, a damper tape is glued around the entire perimeter of the room. It will maximally protect the future screed from squeezing during drying.
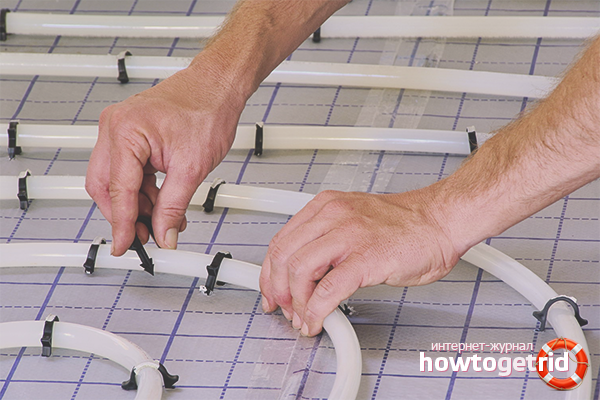
- After that, you can already start laying out the pipes. This should be done strictly according to the instructions so that unexpected troubles do not arise in the future.
- Then follows the connection to the distributor. Before pouring the screed, the system must be checked for possible problems and holes in the pipes.
- And finally, the final stage. The floor is poured with concrete screed, carefully leveled and left to dry completely.
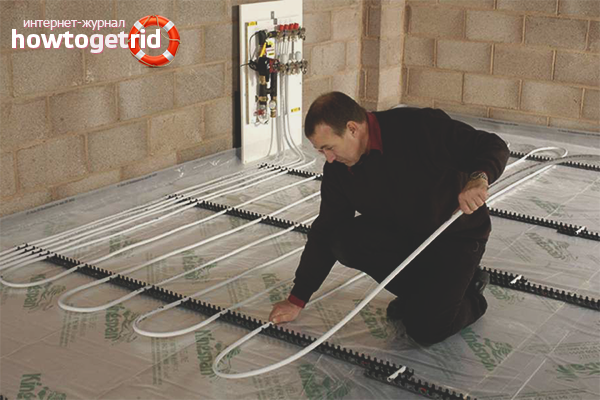
Installation in a wooden house
In principle, there are few differences. The main thing is that instead of the screed, special modular systems are used, on which the pipes are fixed. And on top there is a thin protective layer and the floor covering is laid out.
Electric floor installation
The installation of this system is carried out after the final leveling of the base of the floor and its thorough cleaning from dust and debris. Further, everything is pretty similar to the previous option. The base is covered with a layer of heat and waterproofing. Foam with a thickness of 5-10 cm with the addition of a heat-reflecting foil layer is perfect as thermal insulation.

After that, the heating elements are installed. Each type, installation features are slightly different, you can see them on the instructions attached to the product. Do not forget that it is advisable to install the system only in those places of the room where the furniture will not stand.
Then the reinforced screed is laid out, followed by tile adhesive. At the end, the floor covering is mounted. Do not forget that from the cable to the wall you need to conduct a thermostat.Cable floor heating is poured with cement screed and left for 30 days. Only after a month can you start operating the system. However, you need to start with low temperatures, gradually raising it. If the film method of floor heating was chosen, we dispense with screed. Finishing flooring is installed directly on the heating elements.
You can warm the floor and the house as a whole in several ways. Which one to choose is up to you. Based on the pros and cons of each of these, you are sure to make the right choice. And based on the instructions for the product and this article, the floor will be laid correctly and will last for many years.
Video: underfloor heating - pros and cons

Submit