The content of the article
- 1 Types of Laminate
- 2 Necessary tools
- 3 Important general requirements for laying laminate flooring
- 4 The process of laying flooring with double locks ("click" locks)
- 5 The process of laying flooring with locks
- 6 The process of laying adhesive laminate flooring
- 7 Supporting Instruction
- 8 Video: how to lay the laminate yourself
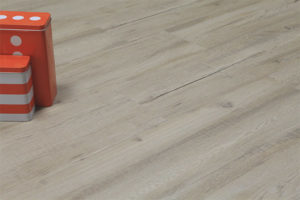
High-quality lay laminate flooring is considered one of the most difficult repair processes. Laying a laminate needs constant monitoring and attention to detail. Compliance with simple requirements will help the flooring to serve for a long time, and proper care will provide a beautiful aesthetic appearance for many years. You can lay the laminate on your own, without resorting to professional masters. The styling technique is not difficult when all working moments are taken into account. Before starting work, it is worth considering carefully all types of laminate and choosing the most suitable one according to technical characteristics.
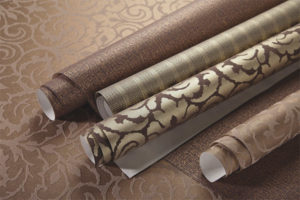
Types of Laminate
Laminated flooring is divided into two types of fastenings: adhesive and castle. Glue is attached with glue and is easy to install. The castle type is divided into “click” fasteners and “lock” fasteners. “Click” locks are referred to by professionals as double locks, which are extremely reliable. This type of fastener is quite difficult to damage during operation and it creates a strong connection.
“Lock” locks with spikes, on the contrary, are rarely used by masters, gradually abandoning them. It is difficult to create a stable connection, since the adhesion of the plates is weak, as a result of which the coating will not last long. Nevertheless, the price of such a laminate is much lower than with double locks, but it is almost impossible to get a high-quality floor using it.
Necessary tools
An electric jigsaw, which is used to cut small or non-standard holes, such as doorways, a recess for the radiator legs and other curly objects.
- Wooden or silicone hammer for landing plates.
- Building tape, notebook for writing and pencil will be indispensable.
- Blades to maintain a certain gap between the wall and the coating
- Staples metal.
Important general requirements for laying laminate flooring
When installing not only a laminate, but also any floor covering, you need to be guided by the basic requirements and the advice of masters. One of these requirements is a flat floor without potholes and bumps. It is permissible to lay the laminate on the old floor, be it linoleum or carpet. However, it is worth considering that the surface should be smooth - no one has canceled this rule. The coating is placed perpendicular to the window so that the rays of light go in the direction of the plates. In cases where this advice is neglected, the light emphasizes all the joints and flaws of the floor, which complicates the creation of a beautiful aesthetic appearance. Many craftsmen use diagonal laying of the laminate, but the technology itself is considered difficult for an unprepared person and rarely justifies the effort.
Before you begin installation, you should measure the width of the room and, as a result, the width of the extreme plate of the row. You also need to know that the gap between the wall and the laminate sheet should be about 1 cm in cases where the width of the room is less than 10 meters. If the room is more than 10 meters, the gap is calculated by the formula 1 meter multiplied by 1.5 cm. Do not neglect the size of the gap, making it smaller, because the coating tends to expand under the influence of heat, pressure and other factors, resulting in hillocks.In those cases when, when calculating the width of the extreme plate of the row, it turns out to be less than 5 cm, it is required to saw the first and last panels to the same width with a jigsaw. Lay the plate from the left corner in the direction of the light, that is, perpendicular to the window. After laying the row, blades are inserted between the wall and the coating, which are removed after installation.
The process of laying flooring with double locks ("click" locks)
Installation of the first plate always starts from the left corner of the front wall. The second panel is attached to the first side by inserting the lock into the groove at an angle of 30-40 degrees, then it lowers to the floor, as a result of which the locks engage. Such a scheme is valid during the installation of the row to the end. When the last panel is placed against the wall, you should use a metal bracket, which will facilitate convenient tamping of the plate. Before proceeding to the second row, you need to offset the end seams by 30 cm compared to the first row. Such a simple technique will evenly distribute the pressure on the floor during operation.

Laminate flooring looks beautiful when the panels are staggered. To achieve this effect, you need to cut the panel into two equal parts, thereby starting the next row with one of them. There are two ways of laying the second row: you can connect the plates with the ends to each other, and then insert several panels fastened in one row into the grooves of the first row along the entire length. Actions are performed at an angle of 30-40 degrees, avoiding the breaking of fasteners, after which the inserted row drops to the floor and the locks are connected. The next method involves connecting the long sides of the plate, and then carry out the installation of the end plates using a hammer. Using the latest technique, a piece of laminate will come in handy, on which you will need to knock, applying to the end of the driven panel.
The process of laying flooring with locks
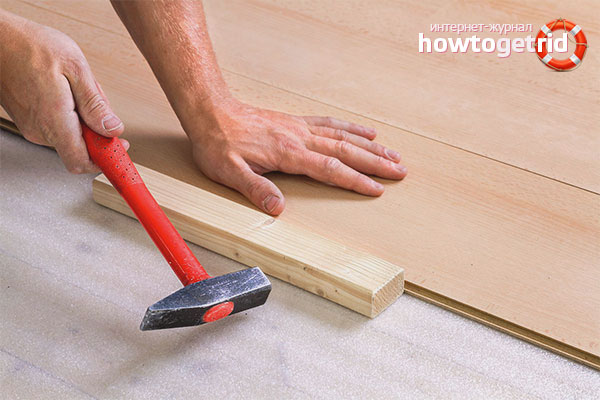
This type of locks differs from the previous one in the connection process. The plates have peculiar protrusions or spikes from the end that are inserted into the grooves of the next panel. The main requirement when laying this type of coating is a horizontal floor position. The panels are inserted with a hammer and a beam to ensure a stable grip. Laying starts from the left corner of the front wall, the panels are attached to each other with the front side. The technique of a chessboard is observed the same way as when installing a laminate with double locks. However, in the next row, the first plate is horizontally spiked in the groove of the first row. The next panel of this row is connected to the first row in length and only then is inserted into the groove of the first plate of the second row with a hammer.
The process of laying adhesive laminate flooring
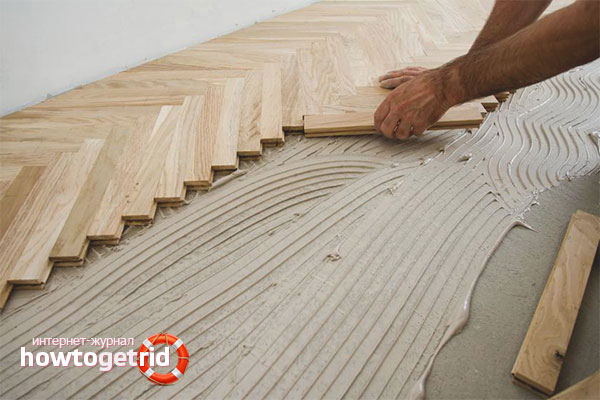
One of the most complex coating technology is the installation process of the adhesive laminate. This technology is good in that the adhesive base provides durability and reliability of adhesion of the plates to each other. Operation is allowed after twelve hours from the moment of installation. Installation of this type of coating requires caution and accuracy, since it will not be possible to dismantle and start over. It is forbidden to use glue in large quantities, you should fully adhere to the attached instructions. As for the process itself, it is identical to the installation, which is used for laying the coating with double fasteners. The only nuance of this technology is that the installation process takes a lot of time. It is also worthwhile to ensure that glue from the seams does not fall on the product. Upon completion of the installation of the laminated flooring, the blades should be removed from the gap. Next, the slot will cover the baseboard, which must be fixed on the wall.
Supporting Instruction
- Trimming products that remain after sawing the plates can be used at the beginning and at the end of the row. In this case, the length of the scraps should not be less than 30 cm.
- Gaps must be left in the doorways, along the walls, as well as in cases of joining the laminate with a different coating.
- It is allowed to remove the blades from the gaps immediately during the installation of the lock plates, however, when laying the adhesive coating - after the glue dries.
- Under the laminated floor, it is allowed to mount water-based warm floors.
- Before starting work, all doors should be removed.
Video: how to lay the laminate yourself


Submit