The content of the article
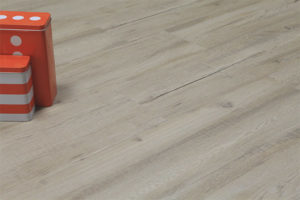
Linoleum is a fairly sought after flooring. This is not at all surprising, since it has a number of significant advantages. The main ones are price, variety, functionality and reliability. It can be installed on any type of surface, including wood. This will be discussed in the proposed article.
Is linoleum needed for a wooden floor
Before you go to the store and choose linoleum with a suitable pattern, you should decide whether you need it at all. A real wooden floor is a priori one of the best coatings. It is enough to cover it with varnish or paint and voila! You have a beautiful floor that looks spectacular and elegant.
However, this option is only suitable if the apartment or house is still new. In old buildings, wooden coatings lose their appearance and quality. Cracks and other defects appear. In this case, the use of linoleum as an additional coating will be very appropriate.
So, if you have decided and firmly decided that housing can not do without linoleum, read on.
Surface preparation
So, you can immediately rewind the required amount of linoleum and lay it on the floor. The result will be directly proportional to your efforts. Therefore, do not be lazy and start all over from the very beginning. And first of all, you need to inspect the wooden surface of the floor, namely:
- Inspect for rotten or broken boards;
- Check metal parts (if any) for fungus or rust;
- Make sure there are no foci of rot;
Also, do not forget to carefully inspect the floor for traces of nasty insects that can damage the wooden structure. If even no traces were noticed, it is advisable to still treat the floor with special pest agents.
The initial inspection is completed. If all of the above items are passed to "5", you can proceed to surface preparation. If at least small areas with rot were found, the wood in that place should be replaced with new. Otherwise, its expansion cannot be avoided.
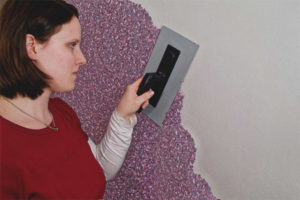
One of the main disadvantages of linoleum is that it absolutely does not hide the unevenness of the floor. Therefore, it is very important to treat the coating to its ideal state. To do this, the paint is initially removed, and then everything is sanded with a plane or electric grinder. The effect of them is the same, but the second tool will significantly reduce the time.
After that, the surface is cleaned, and sheets of plywood or chipboard are laid on top. They are installed end-to-end with each other, and glued to the floor using a special mixture of PVA glue and building gypsum. If you do not trust adhesives, you can additionally nail the sheets to the floor with nails. The gaps between the plywood can be treated with the same adhesive. What follows is the most enjoyable stage - rest. We wait until the glue dries completely. But before that, you should make sure that all stages are done qualitatively, and after a year you don’t have to hide and redo everything.
The choice of linoleum
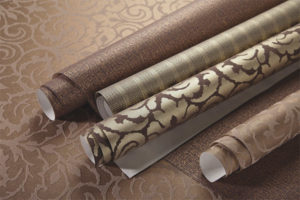
It was said above that rest is the most pleasant stage in repair. However, for some it is much easier and more enjoyable to spend hours shopping and making new purchases. And it doesn’t matter if it will be any branded items or a choice of building materials. If you are one of these shopaholics, you will definitely like this part of the article, because we go to the store to choose linoleum.
First you need to know what important criteria exist for the choice of linoleum.
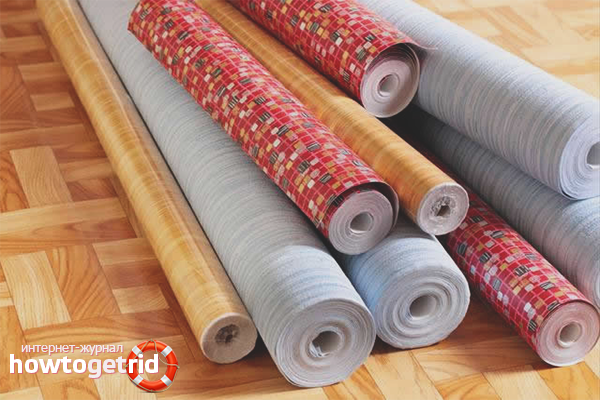
- First of all, you should pay attention to price and, accordingly, quality. Quality products at a low price are a rare exception. And, unfortunately, linoleum is not. Therefore, if you want the material to serve you long enough - do not spare money. Surely the proverb about a mean who pays twice is known to everyone. So, forget about it in the store.
- Design. Appearance is also important. However, there are no special tips. The main thing is that the coating harmoniously fits into the overall design of the room. At the same time, not only color options, but also graphic ones can influence the style. For example, a strict image does not fit very well in the children's room. But in the living room it has a right to life (if the style of the room is made in the same simple style).
- Thickness also plays a role. Not only sheets of plywood will provide a flat floor in the room. The thicker the linoleum, the better it will hide various deformations. The thickness of the upper protective layer is also important. If linoleum will spread in the passage room, then the most protected models are recommended. This will allow you to extend the life of the flooring by more than one year.
The selection suggestions above will greatly facilitate and speed up the process of buying linoleum. If you wanted to go shopping longer, don't despair. Quickly buy building material, and then go to a tea or coffee shop (depending on what your soul is up to) and enjoy pleasant aromas while choosing your favorite drink that is made in different parts of the world.
Essential tool
Having returned home with rolls of linoleum and a package of fragrant roasted coffee beans, we proceed to the final stages of the repair. However, few people will be able to lay the material with their bare hands, so a certain arsenal will be required, which consists of the following materials:
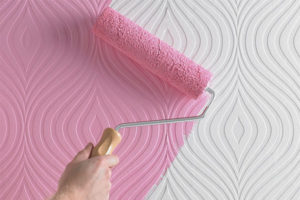
- Roller;
- Sharp knife;
- Notched trowel;
- Ruler up to 3 meters;
- Double sided tape.
Cold welding or other similar adhesive will be needed if there are joints.
Linoleum itself should also be prepared. And it will take at least a day. Under the influence of room conditions (temperature and humidity), the material may slightly compress or, on the contrary, expand. If you immediately stick it, it will lead to unpleasant consequences. Therefore, it should be deployed in a room where it will be installed for a day. During this time, it will also take the form of a floor, which will facilitate subsequent installation.
Installation of linoleum on a wooden floor
So, you have successfully completed all the preparatory processes and are now ready to finally finish this business and complete the floor repair.
We start by measuring the room. After that, we transfer the obtained data to linoleum, add another 8-10 mm to the width and length, and then cut the necessary part with a knife. Surplus in this case is obligatory, as the material may contract over time. You can hide them using the baseboard.
If in your case the width of the room is completely covered by one piece of linoleum - you're in luck, the installation process in this case is much easier. And we will start with him.
Single lane application
For a better understanding, we describe the installation process in stages.
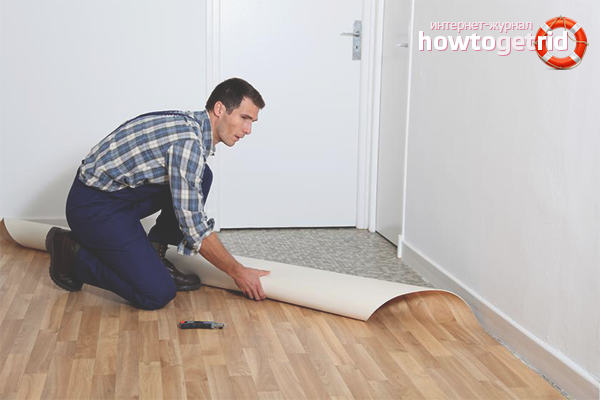
- The prepared section of linoleum is folded in half and laid on the prepared floor. By the way, its surface must be clean and dry, otherwise the material will not adhere well. Adhesive is applied evenly to half of the floor, free from linoleum.
- Further, the curved part of the floor material is laid out on this part. However, wait until the glue has set (about 10 minutes). During gluing, linoleum should be ironed from the center to the edges with a rag or roller (but do not press hard). Protruding excess glue should be immediately cleaned with a damp cloth, otherwise they will leave noticeable marks.
- Further, the process is repeated on the other half of the room. The untreated part of the material is bent, and glue is applied to the floor.
- We repeat the same points that are written just above.
As you can see, there is nothing complicated in the procedure and you can cope with it yourself. Therefore, it is not worthwhile to call a construction team with expensive equipment, beautiful overalls and a strict team leader.
Covering a room with two stripes is somewhat more difficult. However, after reading the instructions that follow immediately after this offer, you will also succeed.
Two-way installation method of linoleum
And here is the promised instruction. There are actually several ways, and each will be mentioned. And let's start with cold welding.
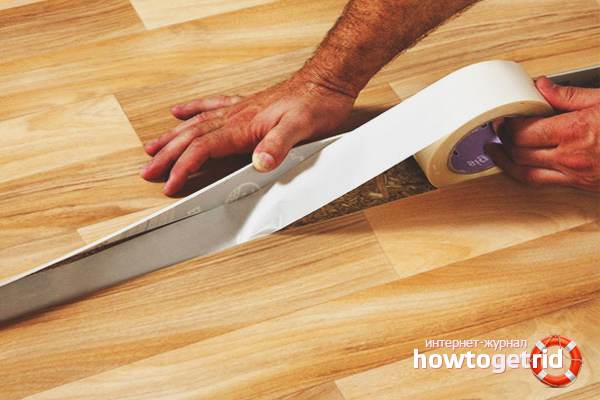
For home, this option will be the best. Cold welding (special glue) is inexpensive. In addition, it allows you to carry out the work yourself and reliably fastens the seams. So, for starters, you should stick both strips in the same way that was described in the previous section close to each other. Next, the seam between them is processed by cold welding, which tightens both parts and reliably protects the seam from moisture. We are waiting for complete drying and ready. Before starting this work, it is also possible to glue a double-sided adhesive tape at the bottom of the seam, which will also fasten linoleum.
Now consider an option that requires certain skills. Making it yourself will be problematic. The bottom line is the use of a special welding machine, which will melt the polymer cord, thus creating a seam. To do this, the cord is laid out at the junction, and then the apparatus moves from the edge to the middle. After the procedure is repeated on the other hand.
Single or dual band option is not so important. You can always cope on your own. And given the advice outlined in the article, linoleum will last a long and reliable time.
Video: how to put linoleum on the floor with your own hands


Submit