The content of the article
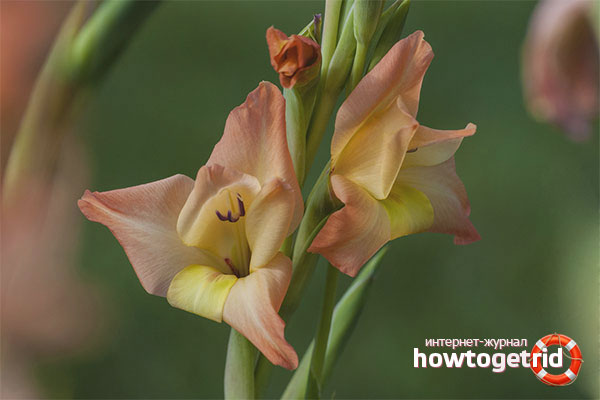
Gladioli should not winter in open ground. From excess moisture and low temperatures, flower bulbs get sick, bugs start up in them, and they begin to rot. Gardeners with many years of experience are advised to first take care of the dark varieties, and then all the rest.
Ideal time for picking bulbs
Gladiolus stop developing at low temperature. It is recommended to remove the bulbs from the ground after 50 (for early varieties - 30) days after the buds open. Flowers are necessarily cut, leaving only the stems, so that the root of the plant develops better, and receives the maximum amount of nutrients.
Sometimes flower stalks in gladioli form too late, near the end of summer, so they are advised to break off, otherwise the bulb will not have time to ripen. Harvested in the mid-end of September, when the night temperature drops to +10 degrees. The plant does not tolerate + 2º poorly, so they try to dig out all, even the smallest, bulbs as quickly as possible.
In cases where the weather is sunny and dry even in October, gladioli can be in the ground 40-50 days after flowering.
Special situation
If the leaves become covered with brown spots or dry quickly for no apparent reason, it is recommended to dig out the bulbs immediately. Such symptoms indicate that the plant was affected by the fungus, and seed can be saved only at the initial stage of infection.
Weather
The earth should not be too wet so as not to stick to the workpiece, but not too dry. Cleaning is recommended on sunny days without precipitation, otherwise it is highly likely to miss the children of gladioli, which clog the soil in the garden.
How to dig a workpiece
Suitable forks with wide flat teeth or a regular shovel.
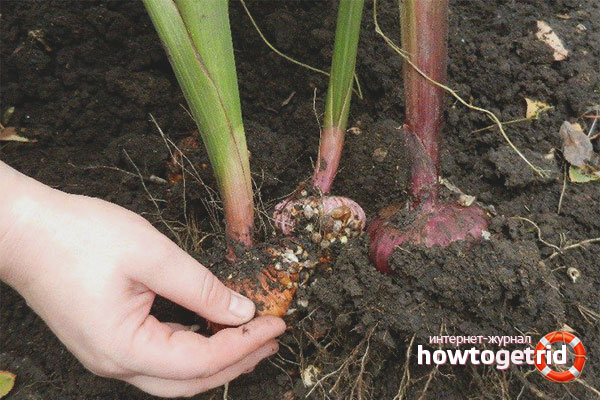
- The bushes are neatly dug, trying not to touch the root.
- Gladioli are pulled by the stems, and shaken off the ground.
- Be sure to pick up small daughter seeds, which are considered the most viable and persistent.
- If the stems are green, the flowers should lie down for several days in a room on a plastic film so that the nutrients go to the root.
- The yellowed aerial part is cut off immediately, leaving a centimeter tail over the tuber.
- It is not advisable to leave a stump longer than 1.5 cm. Thrips attacking gladioli live at the base of the flowers, and can move into bulbs, destroying all the seed.
- Spoiled and diseased workpieces are collected in a separate container. The maternal bulb is also torn off to protect the rest from infection and fungus. The rejected material is burned.
How to dry
The first step is disinfection. Planting material obtained from infected gladioli is treated with fungicides separately from the rest. For healthy workpieces use a weak solution of potassium permanganate or boric acid.
Roots are cut off from the bulbs, not too short, and the planting material is cleaned from the ground. If necessary, rinse under the tap or in a basin. Dip in the solution for half an hour, and then proceed to drying.

Step 1: UV
Sprinkle the bulbs soaked in disinfectant onto baking sheets trapped in paper or napkins and expose them to the sun. To bring into the house after complete evaporation of moisture, and transfer to plastic containers or wooden boxes.
Step 2: Temperature
The bottom of the containers should be mesh. Bulbs are laid in 2 layers, and transferred to a drying room. A prerequisite is good ventilation.
Harvesting for 15 days should be stored at a temperature of + 25-30 degrees.Once every few days, planting material must be mixed so that moisture does not accumulate in the lower layer, and gladioli are saturated with oxygen.
The next 1.5 months, the workpiece must be stored at + 20-23 degrees.
Step 3: close monitoring
Corms are recommended from time to time to inspect, removing diseased specimens. Reddish or purple small spots indicate that the planting material is affected by thrips. Billets that were eaten out from the inside can only be thrown away. The remaining instances can be tried to save:
- Transfer tubers into plastic bags, several in each.
- Spray damaged workpieces with insect spray or 4% Arrivo solution.
- Tie packages tightly so that the tubers are saturated with the product and the thrips die.
- Hold for 30-60 minutes.
To be sure that the bugs do not return, you can immerse all the bulbs in hot water (about 50 degrees) for 5-7 minutes. Be sure to dry thoroughly so that the fungus does not wound up in the wet planting material.
Important: Valuable varieties damaged by thrips or disease are not discarded, but pruned. Disinfected in potassium permanganate. The slice is treated with brilliant green.
Storage methods
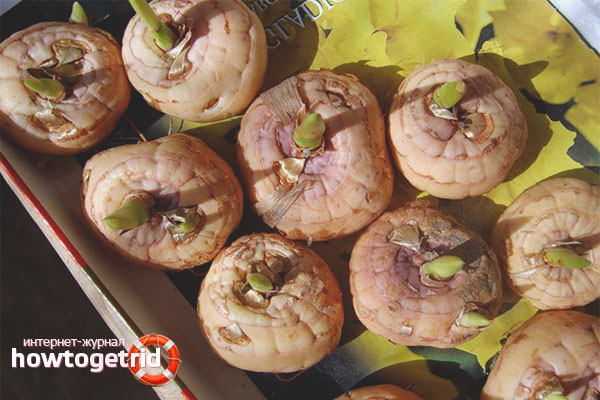
To determine that the planting material is ready for the last stage is easy: if the old corm is separated from the new without problems, you can pack the seed gladiolus in storage containers.
Method 1
Cardboard boxes made of wood are useful, you can stock up on plastic containers. The main thing is that they have holes for ventilation.
- Wrap each onion with a piece of newspaper or blank paper.
- Put in boxes. To prevent pests, pour naphthalene into the container. An alternative is 3-4 cloves of peeled garlic.
- If the basement is damp, put a box of gladioli in the refrigerator. A lower shelf for storing fruits is suitable.
Method 2
Put the bulbs wrapped in newspapers into the vegetable net. Store in a basement or refrigerator at + 5–8 degrees, and humidity not higher than 85%. To scare away pests, add a few cloves of peeled garlic.
Method 3
Remove the top husk from the bulbs. Heat paraffin, and immerse each in a liquid product. Do not flush the protective film when landing.
Common mistakes
- Do not remove the top husk from the bulbs. It protects planting material from drying out. The exception is with paraffin treatment.
- You can not store gladioli in plastic bags, even with holes. They do not allow air to pass through well, and condensation builds up inside.
- Germinated planting material must be moved to a cool room with diffused light.
Harvesting and storing gladioli is not as troublesome and complicated as it may seem to novice gardeners. It is enough to remove the bulbs from the earth in a timely manner, properly dry and process, and in the spring they will please with friendly shoots and beautiful flowers.
Video: how to dig and store gladioli

Submit