The content of the article
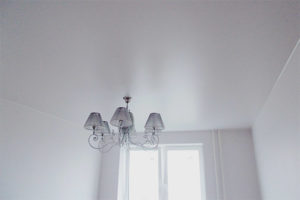
Modern false ceilings delight with the splendor of shapes and colors, make the house more spacious and lighter. The unusual design is of great interest and makes a pleasant impression on visitors. New construction technologies help efficiently use the ceiling space. As a result, each room turns out to be interesting and unique.
Today, the market offers an abundance of affordable materials for the decoration of the ceiling. Experimenting with form and color, you will be able to implement the most unusual design ideas. This article will help you with this. She will talk about the technology of installing a plasterboard false ceiling and teach you to understand the intricacies of work.
Preparing for the installation of a false ceiling
Installation of a false ceiling is a technically painstaking work requiring preparation. Get building materials, collect the necessary tools. Everything should be prepared so as not to be interrupted during work.
Necessary tools and materials
- drill with a set of drills;
- building level;
- water level;
- screwdriver;
- pliers;
- square;
- hacksaw;
- hammer;
- roulette;
- marker;
- a knife.
Materials:
- plasterboard sheets;
- guide profiles;
- metal profiles;
- suspensions for a profile;
- metal screws;
- concrete anchors;
- brackets;
- dowels.
Installation of a false ceiling
Hinged structures consist of a metal or wooden frame on which drywall sheets are attached. Thanks to the hinged technology, the ceiling is easy to give any shape. Overlappings are single-level and multi-level.
The first option is the simplest and quickest to install, its main task is to hide the irregularities of the old ceiling. The second option is more complex and time-consuming, its purpose is not only to mask defects, but also to perform a decorative function. Installation of any hinged structure takes place according to the same scheme and is divided into several important stages.
Ceiling marking
At the first stage, it is necessary to make markings on the surface of the old floor. Note the height of the future ceiling, as well as the location of the frame.
- Determine the lowest angle of the room. Measurements are taken using a tape measure, applying to the corners of the room. When the minimum level is found, make a mark on the wall, retreating 5 cm from the ceiling. If you plan to install lighting in the form of a built-in backlight, step back 10 cm.
- Transfer the mark to all other sides. Take advantage of the hydraulic level, it can be made from a thin hose. This is a convenient tool, but you need an assistant to work with it.
- Now connect the marks on the wall. Use a dye cord, but if there is no such tool, take a long and even bar. Draw horizontal lines along the entire perimeter along it.
- Attach the guides to the wall and make marks using a drill. The profile has ready-made mounting holes. Drill a recess for dowels through them.
- Glue sealing tape to the back of the guides. It is needed to dampen vibrations, this will help prevent cracks. Then, with dowel nails, attach the profile to the wall.
- Make parallel lines on the ceiling for the longitudinal support strips. The width of the standard drywall is 120 cm, so the distance between the profile should be 60 cm. This will allow you to securely fix the sheet on the slats.
- Draw labels for suspensions.Mark the points in increments of 50 cm on the lines of the ceiling profile. They are installed so that the design of the profiles in the middle of the ceiling does not sag.
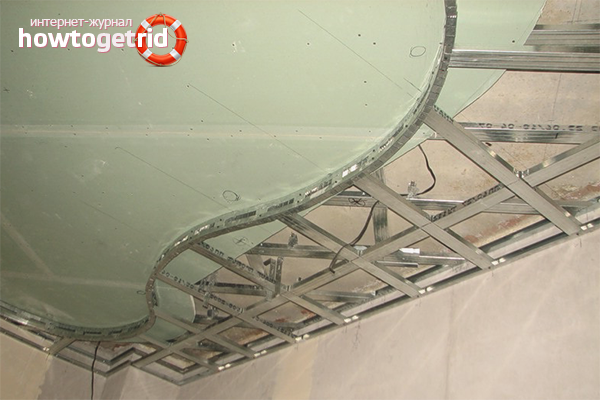
Frame mounting
At this stage, a metal frame is installed. According to the marks made, the ceiling profile and suspensions are attached. The work is done carefully so that the base is smooth.
- Insert the longitudinal bars into the groove of the guides. The distance between them should be 60 cm. Three-meter profile, if the length is not enough, attach one more bar to it and dock them with a special bracket. The total length of the longitudinal profile should be less than the length of the room by one centimeter.
- Attach the suspensions to the ceiling along the profile in increments of 50 cm. Fixing is done with anchor bolts, which, unlike dowels, hold well and do not fall out of the holes.
- Proceed to align the ceiling strips, for this it is convenient to use a cord. Pull it, tied to the outermost profiles. On this cord you will make a single flat plane.
- Fix the profiles on the suspensions with metal screws. Bend the excess segments outward until it stops.
- Attach the transverse pieces of the profile to the longitudinal strips in increments of 60 cm. For the screed, use the “crab” brackets, which are installed in marked places. Fix the transverse profile with the tongues sticking out of the crab.
- Fold the bracket flags toward the slats and screw small self-tapping screws into them. At this stage, the installation of the profile ends. Now the frame is ready and you can start laying electrical wires.
Wiring
After completing the installation of the hinged frame, begin to conduct the electrical cables. It is recommended to do external laying. To prevent accidental burning of the ceiling, all wiring must be protected by a metal box or corrugation.
- Mark up the future cable route. It should pass along the wall from the switch with access to the ceiling to bring to the lamps.
- Set the boxes according to the marking. If you lay wires in a corrugation, then use clips as fasteners.
- Lay the wire in the box or tighten into the corrugation, and then fasten it to the clips. Each line should have a separate box or corrugation.
- Leading the cable to the locations of the fixtures, leave for each supply of wire 15 cm long.
Drywall Installation
After finishing work with wiring, install drywall. Installation of the first sheet starts from the corner. It is necessary to leave a gap between the wall and drywall of 2-3 mm. The next sheet is set with offset - in checker order. Drywall is fixed with self-tapping screws for metal with a step of 15–20 cm. The depth of the hat should not exceed one millimeter.
- Mark up the drywall sheets. On its surface, draw lines that repeat the location of the profile. It is convenient to twist self-tapping screws on these marks. It is also necessary to make a drawing of the location of the fixtures.
- Chamfer the edges of the sheet — they should be beveled. This is done so that the plaster penetrates well into the gap at the junction of drywalls.
- Screw the sheets to the profile. For convenience, you can use homemade T-shaped struts that will hold drywall. Self-tapping screws scroll through all the cells in the profile.
Making holes for fixtures
Sheathing the hinged profile with sheets, check the accuracy of the location of the intended holes. Deviations may appear in the drawing, correct them. If everything complies with the design plan, proceed with the creation of the holes.
- Find the right hole saw for your drill. The diameter of the nozzle must be equal to the diameter of the holes.
- Wear glasses to prevent plaster dust from getting into your eyes.
- Make holes in drywall, taking care not to damage the sheet.
Jointing
There are many nuances in the puttying of the ceiling. To take them into account at this stage, it is necessary to observe the technology.Coat the joints with special putties. These are particularly durable formulations made for plasterboard sheets. Prepare the solution in small portions in order to have time to putty before setting.
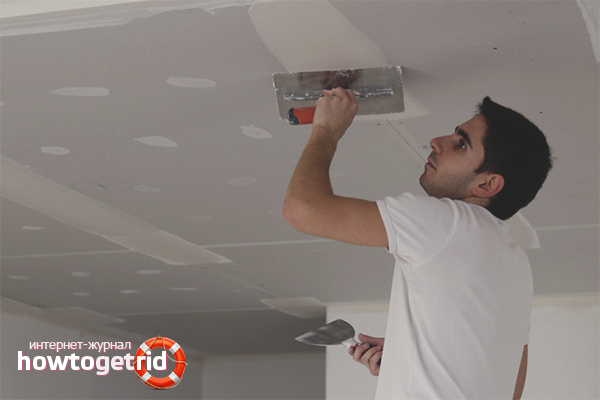
- Having diluted the solution, begin to cover the seams. Do this with a small amount of putty, otherwise the joint will be noticeable and uneven.
- After grouting, take the KURT paper tape and attach it to the seam. Press it with a spatula so that the tape does not come out over the surface of the drywall.
- When rubbing large joints, try to make a wide layer. Excess can always be deleted. The wider you plaster, the smoother the surface.
- Having put the first layer on all joint, allow putty to dry. It takes 10-12 hours.
- After drying, grind all the places on which the putty has been applied. After polishing, a lot of dust will remain on the surface of the ceiling. To remove it, use a vacuum cleaner or a wide brush.
- Prime the entire ceiling. This is done because the base has become patchy after grouting. Drywall and putty absorb moisture in different ways. Therefore, it is necessary to level the absorbency. To do this, use a primer.
Ceiling Putty
The ceiling is the most critical place for repairs. It is always in sight and should be perfect, without cracks and bumps. On a ceiling with a high-quality surface, side irregularities are not visible in lateral lighting.
To achieve the ideal, put the first layer of putty in one millimeter. This will help remove any irregularities in the ceiling. The second layer is applied with a finely dispersed putty on a vinyl basis. It penetrates well into micropores and makes the surface smooth.
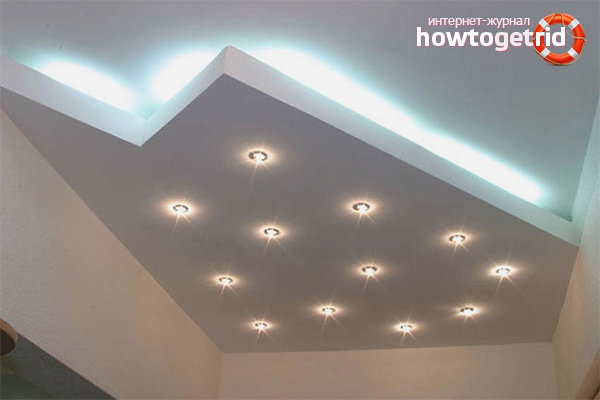
Backlight setting
After finishing the plaster, it remains to mount the spotlights. To do this, remove the wires from the drilled holes, rub the ends and put on the terminals. Then connect to the lamp and insert it into place. It is securely fixed thanks to spacers.
When creating a suspended ceiling from drywall, each of the stages is important. This article details how to create a single-level overlap. Observing the basic rules and technologies, you will be able to independently make a wonderful and durable ceiling.
Video: Installation of a two-level plasterboard suspended ceiling

Submit